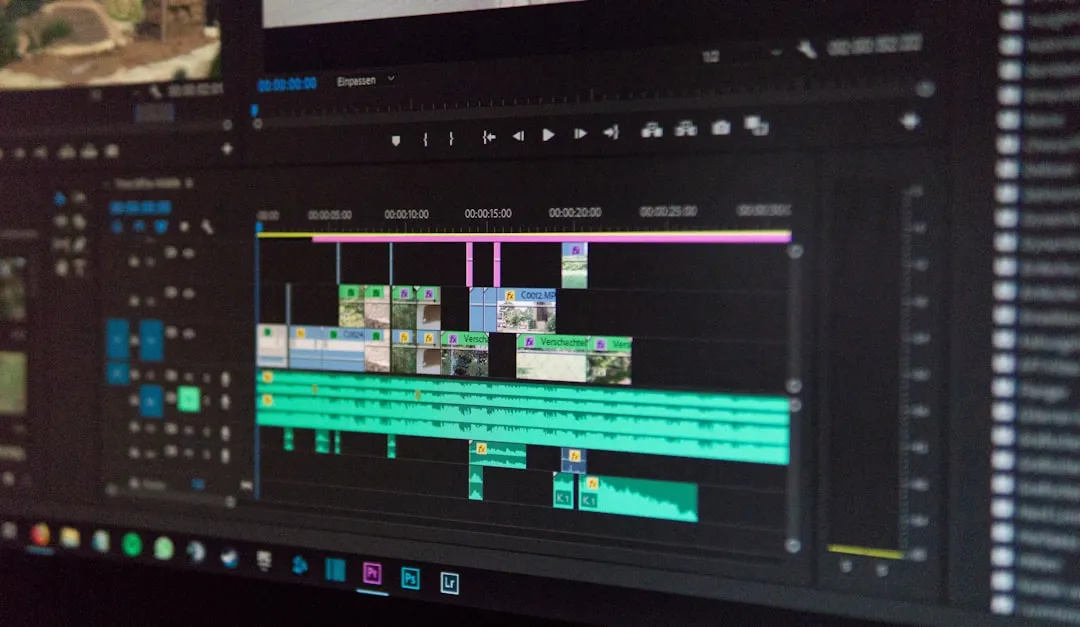
Final Cut Pro has always been a powerful tool for video editing, and with the release of Final Cut Pro 11, new features have been introduced that enhance its capabilities even further. One of the standout additions is the Magnetic Mask feature, which offers a new way to isolate subjects in your videos. This blog post will explore how to use this feature, compare it with the existing Roto AI effect, and discuss additional capabilities that come with it.
Table of Contents
Getting Started with Magnetic Mask
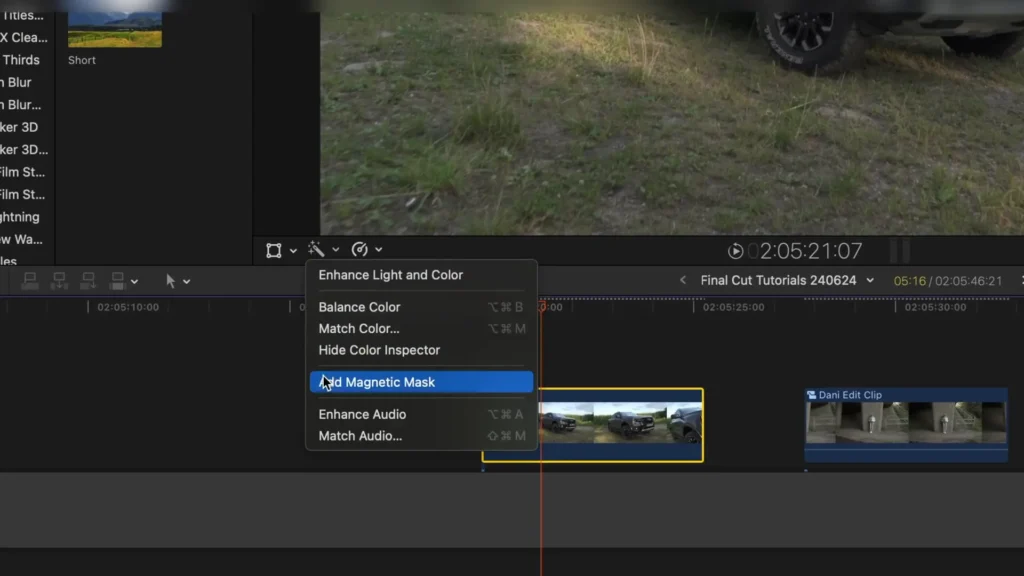
To use the Magnetic Mask effect, first select the video clip you want to edit. Navigate to the wand icon and click on it. From there, choose the option to add a magnetic mask. With just one click, the software generates an impressive and accurate mask around your subject.
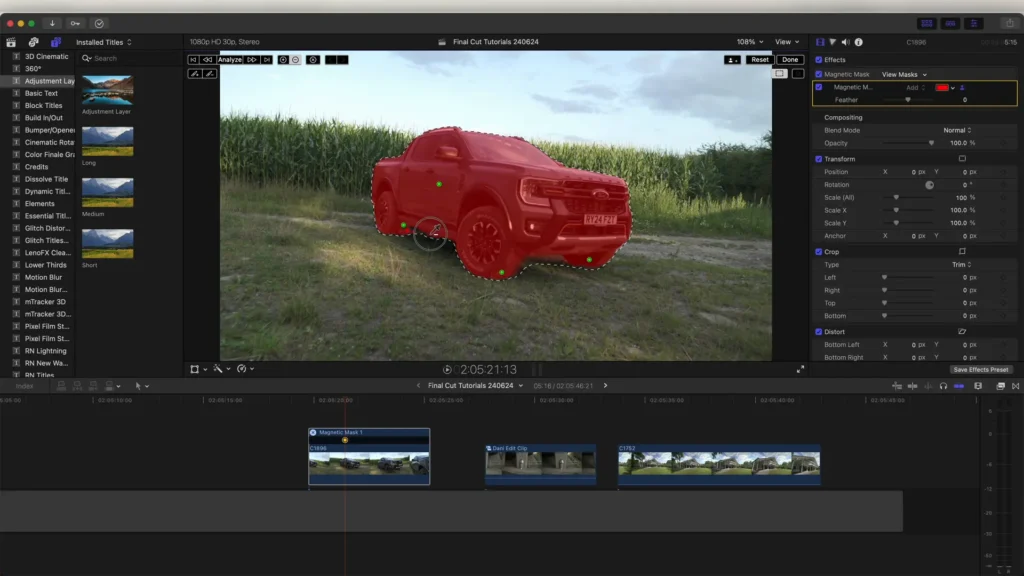
Once the mask is applied, you can refine it further. By clicking on the mask, you can add additional points to enhance accuracy. If you find some points are unnecessary, hold down the Option key and click to delete them. This allows for a more precise masking process.
Tracking the Mask
After setting up the initial mask, the next step is to track it. Click the analyze button, and Final Cut Pro will automatically track the mask to the subject throughout the video clip. This feature is incredibly useful as it saves time and ensures that your mask remains consistent with the movement of the subject.
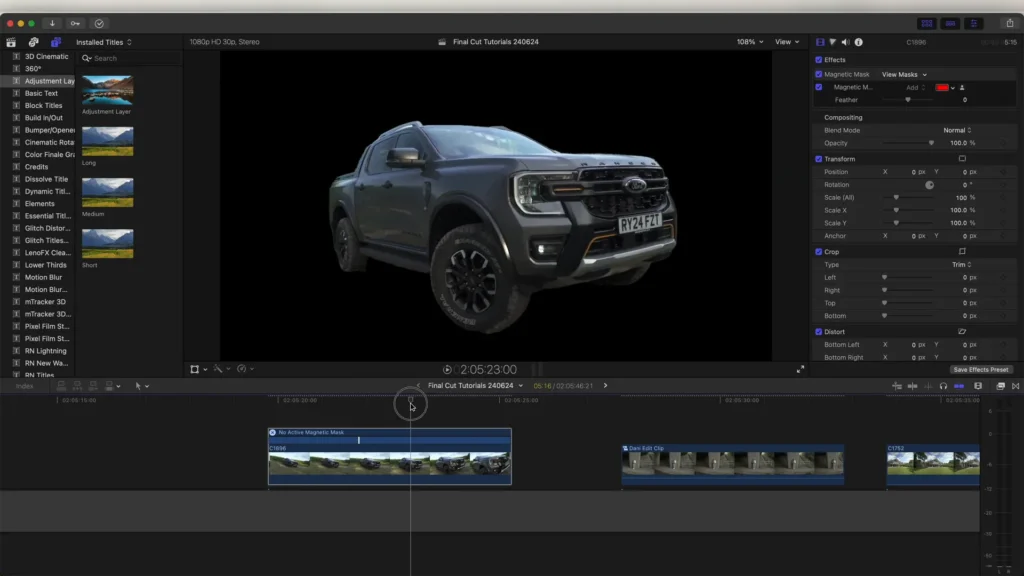
Once the tracking is complete, you can click ‘done,’ and the background will be removed, leaving you with just the masked subject. This opens up a world of creative possibilities for adding effects.
Adding Effects to Masked Clips
With your subject isolated, you can now add effects specifically to that layer. For example, if you want to apply a mask glow effect, it will only affect the top layer where the mask is applied. You can create additional layers beneath the masked clip and apply different effects to them, such as the offset effect.
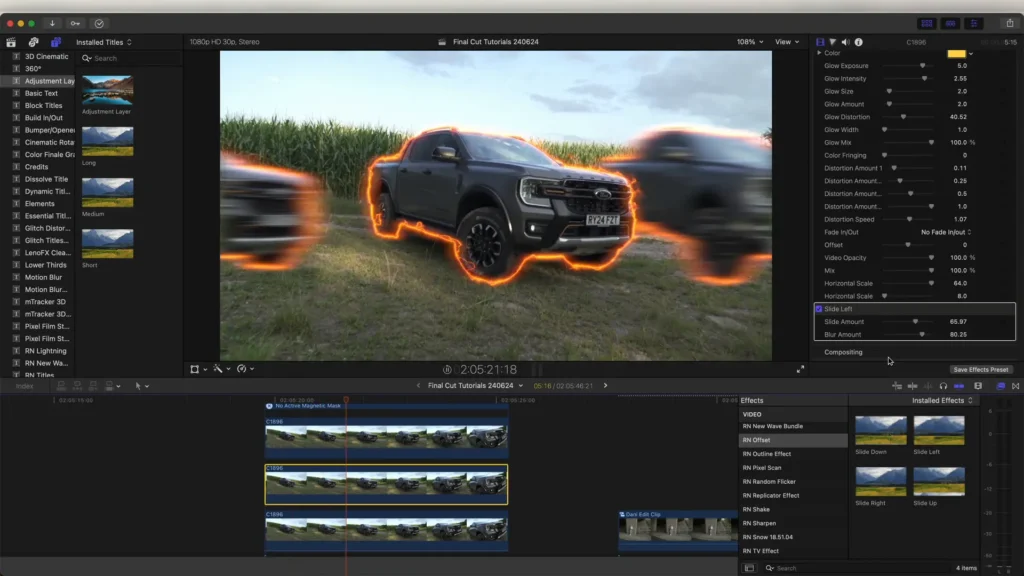
This flexibility allows you to create visually stunning effects quickly and efficiently. Additionally, you can drag effects directly onto the subject, and Final Cut Pro will automatically create the necessary mask for you.
Comparison: Magnetic Mask vs Roto AI Effect
To better understand the capabilities of the Magnetic Mask feature, it’s useful to compare it with the Roto AI effect. While the Magnetic Mask performs well in many scenarios, it can struggle with high-contrast scenes where light and dark areas create complications in the masking process.
In contrast, the Roto AI effect often excels in such situations, providing a cleaner and more accurate mask. This head-to-head comparison highlights the strengths and weaknesses of both tools, allowing you to choose the best option for your specific project needs.
Conclusion
The new Magnetic Mask feature in Final Cut Pro 11 is a welcome addition that enhances the editing experience. While it may not always outperform established effects like Roto AI, it offers a unique and intuitive way to isolate subjects and apply effects. As with any new tool, experimenting with the Magnetic Mask will help you discover its full potential.
For those looking to expand their editing capabilities even further, consider exploring various plugins and effects available online, such as the Mask Glow Effect, Offset Effect, and Pixel Scan Effect.
for more Editing tutorial visit Ranjan Editz
Whether you’re a seasoned editor or just starting out, the advancements in Final Cut Pro 11 present exciting opportunities to elevate your video projects.

