

Welcome to this Alight Motion 3D tutorial where we dive into the art of creating stunning 3D reels. Whether you’re a beginner or a seasoned editor, this guide will help you enhance your skills and make your videos pop with professional-grade visuals. Let’s get started!
Table of Contents
Step 1: Setting the Stage
First things first, add your image and zoom it to full screen. Head over to the blending and opacity settings and reduce the image opacity to make it blend seamlessly with your background.
Step 2: Adding Text and Grouping Layers
Add a text layer at the center of your image. Select both the image and text layers and group them together. This helps in managing the elements more efficiently.

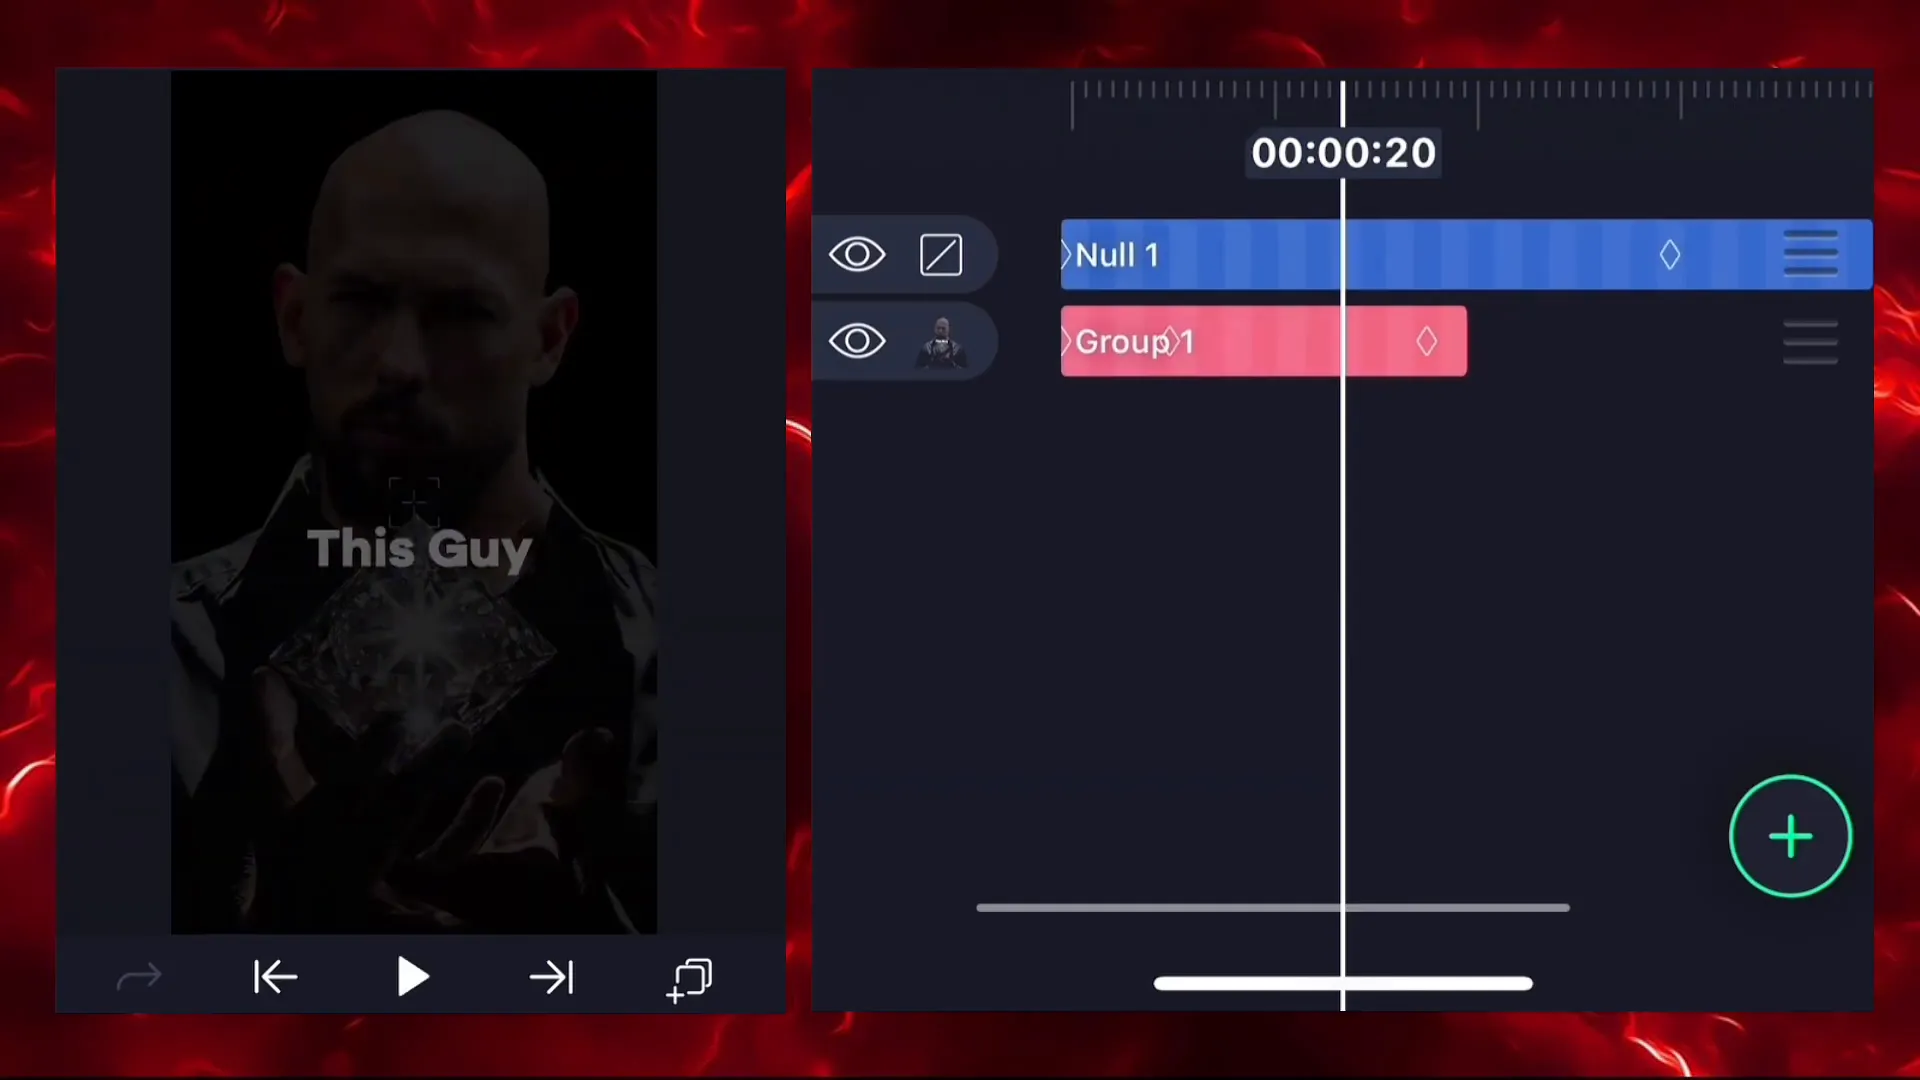
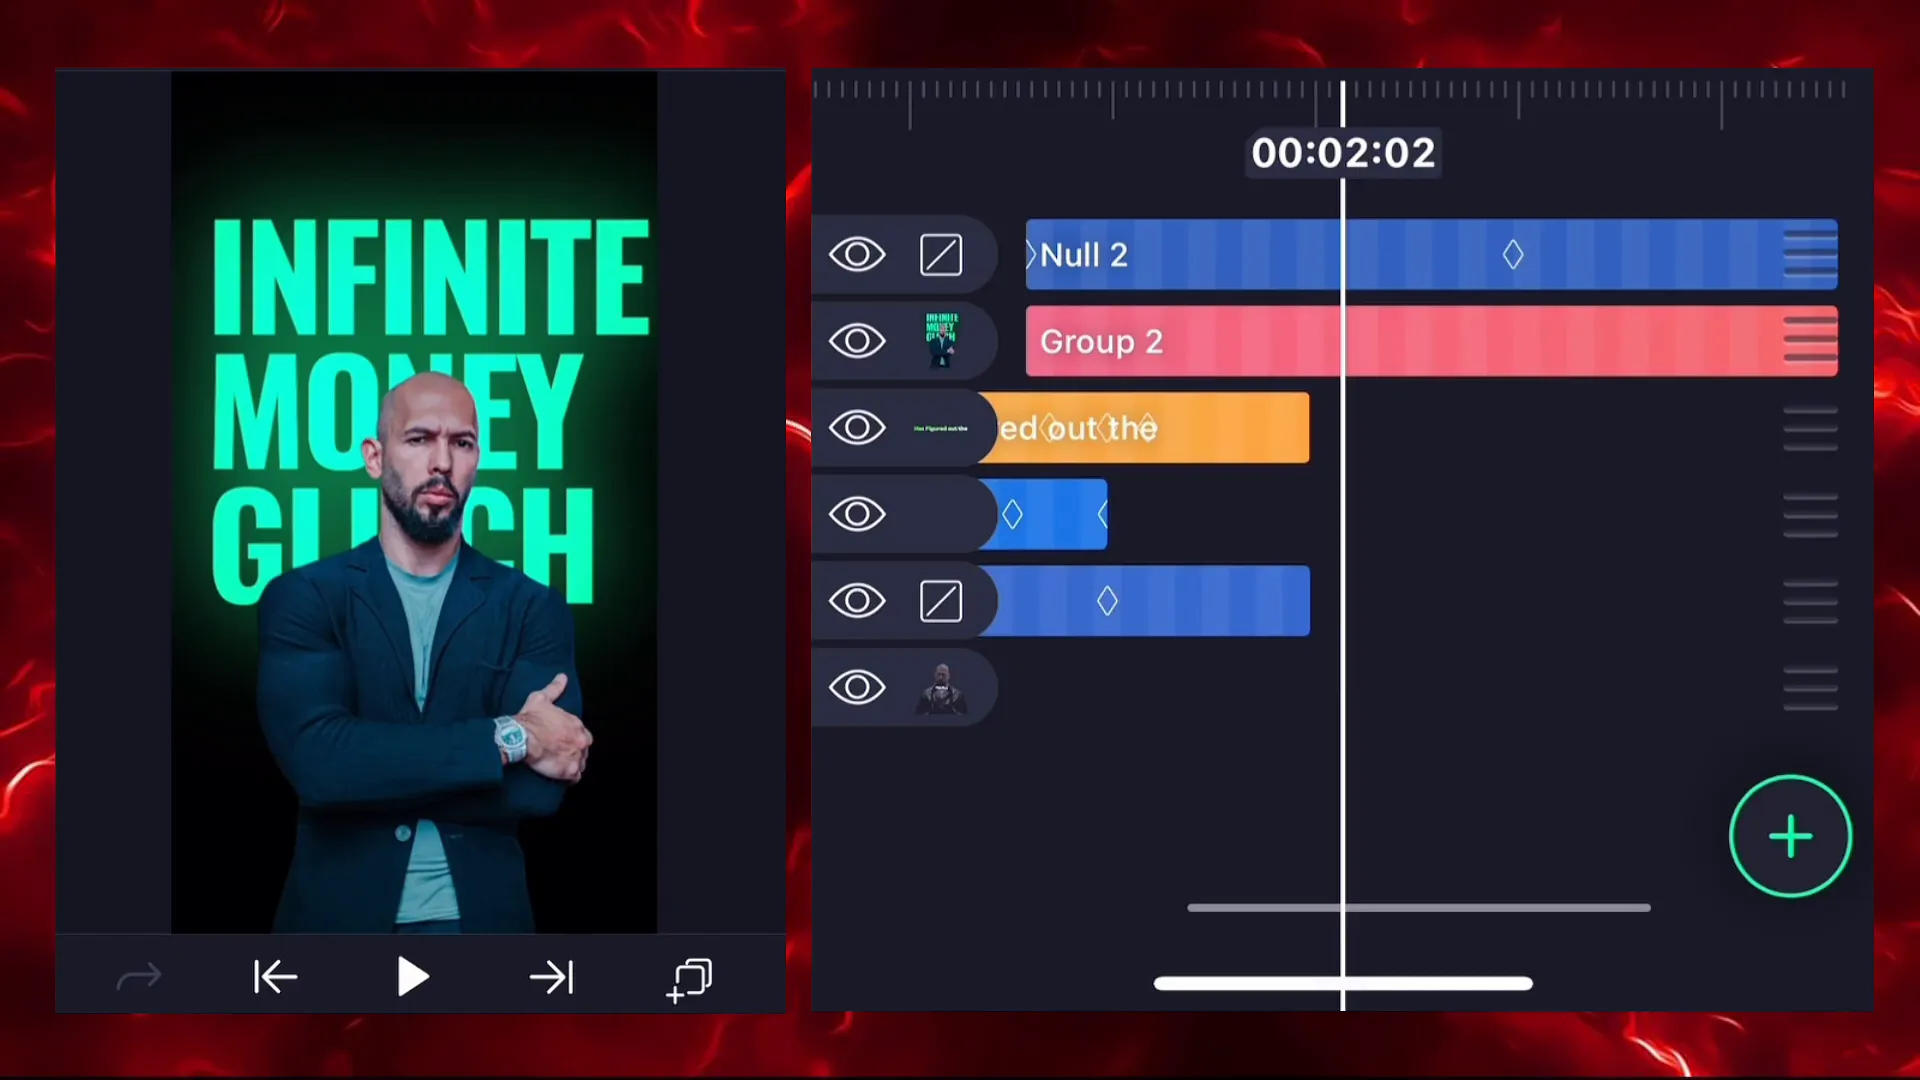
Step 3: Utilizing Null Objects
Navigate to ‘Object and Elements’ and select the null feature. Connect your grouped layers with null one. This will allow you to control the animation smoothly.

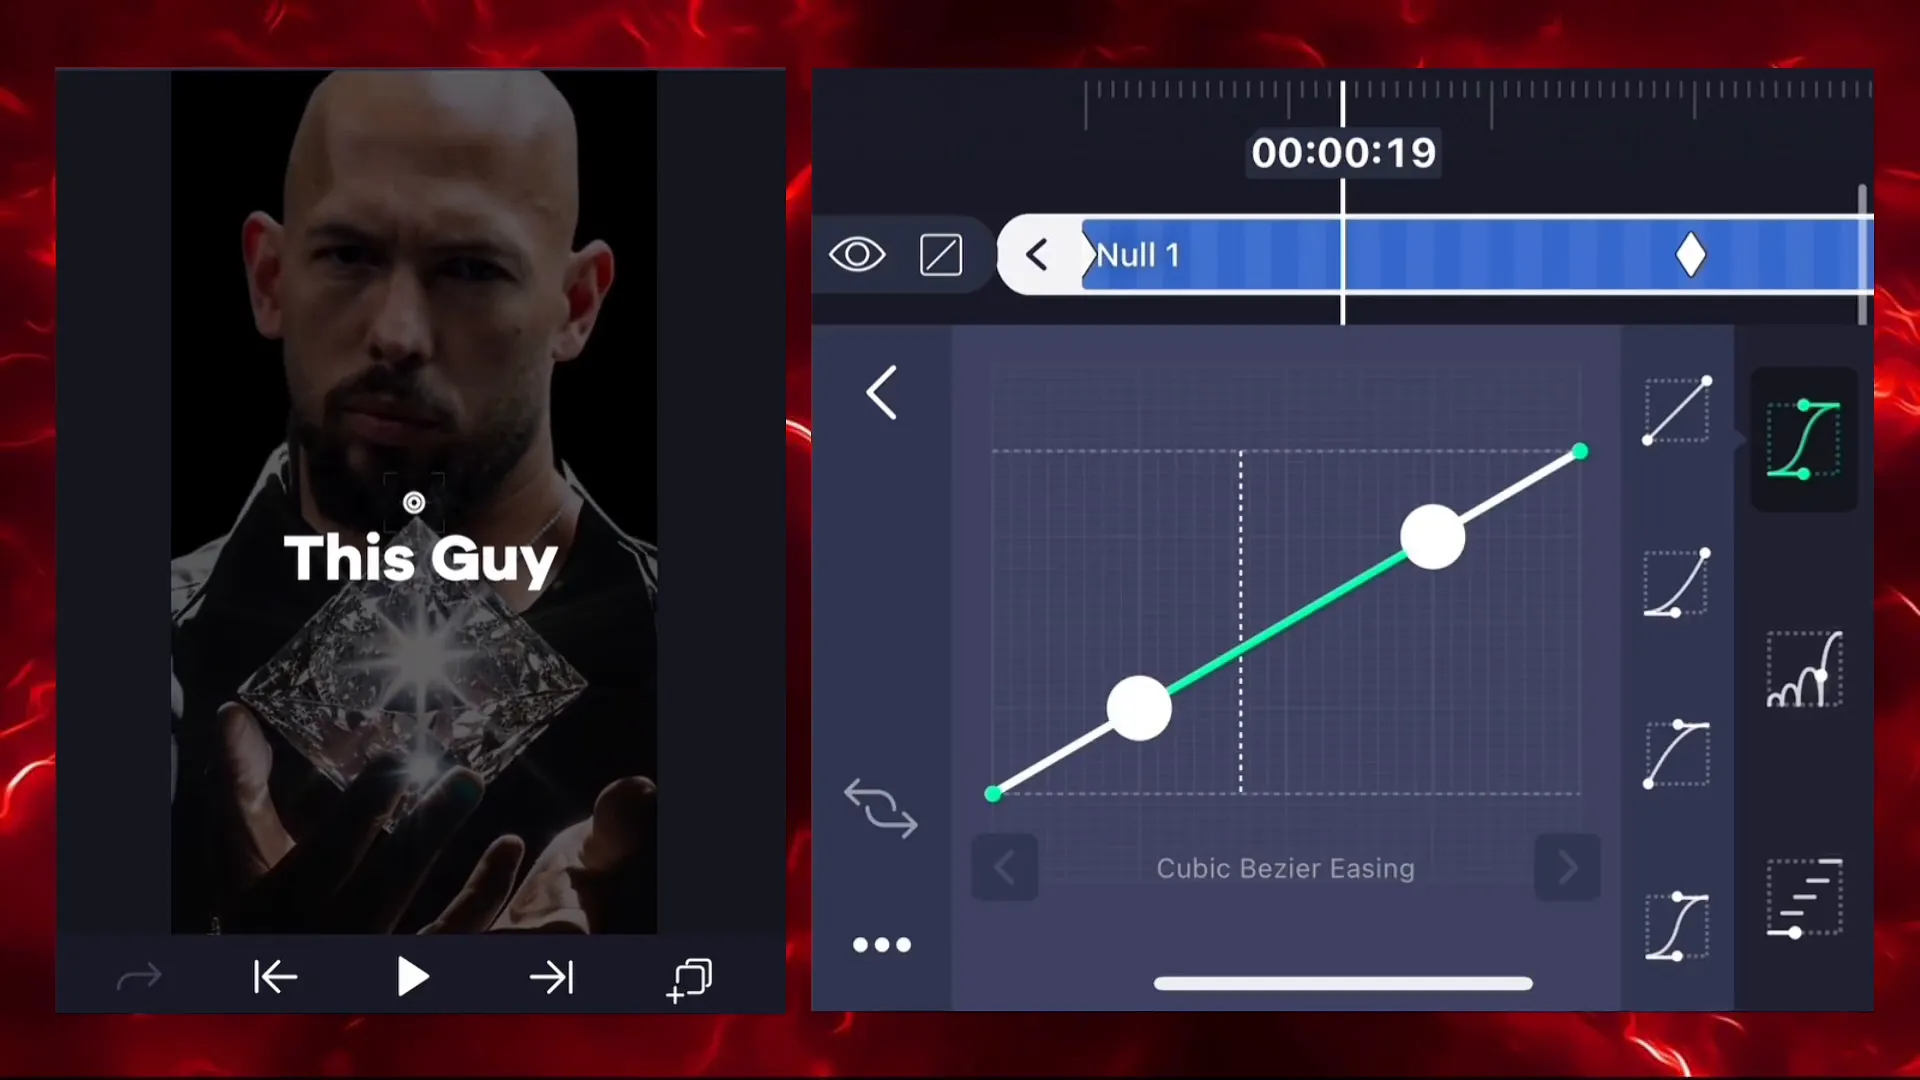
Step 4: Animating with Key Frames
Go to ‘Move and Transform’ and add two key frames. Adjust the first key frame by zooming in on your image using the Z coordinates for a dynamic effect.
Step 5: Creating Fade-in Animation
Add key frames for opacity to create a fade-in effect. Set the first key frame to 0% opacity, increase to 100% on the second, and back to 0% on the third.
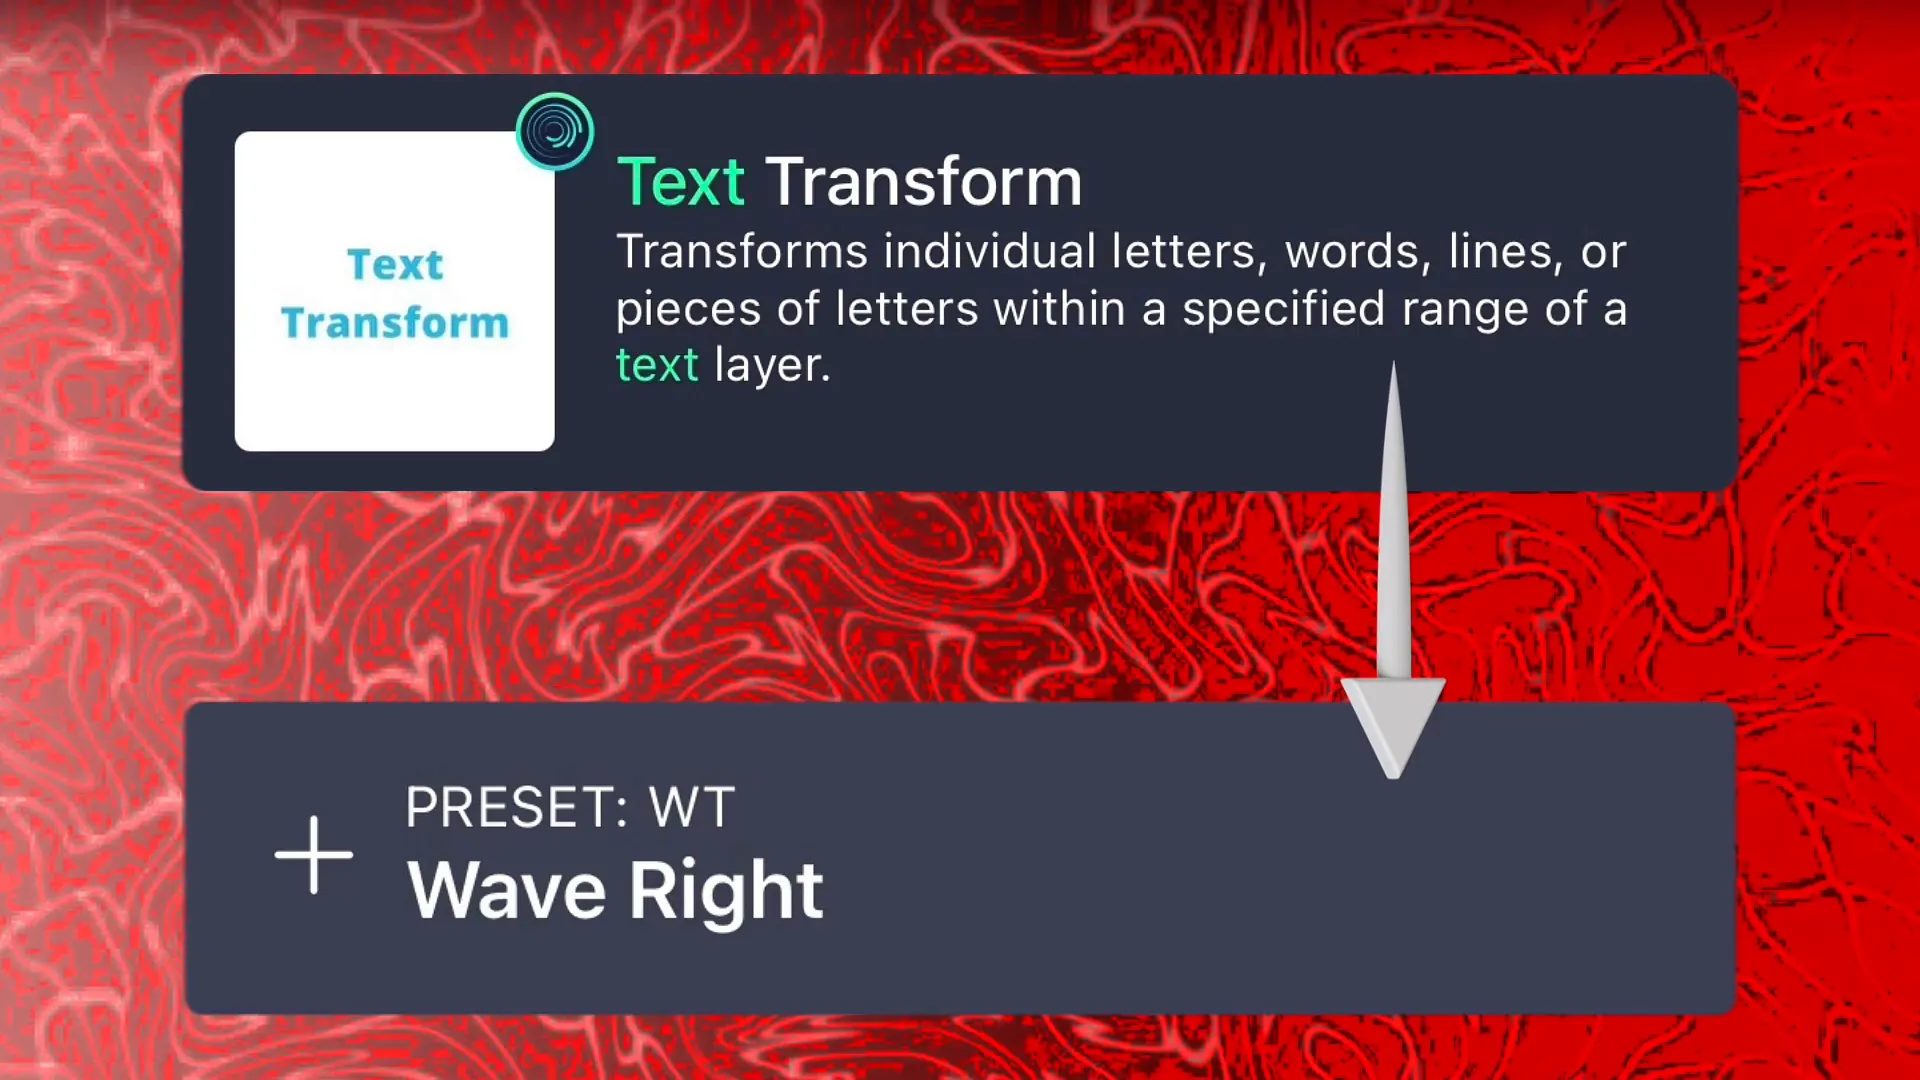
Step 6: Adding Text Animations
Add another text layer and customize it with the color gradient of your choice. Apply the ‘Text Transform’ effect with a preset wave right to animate your text.
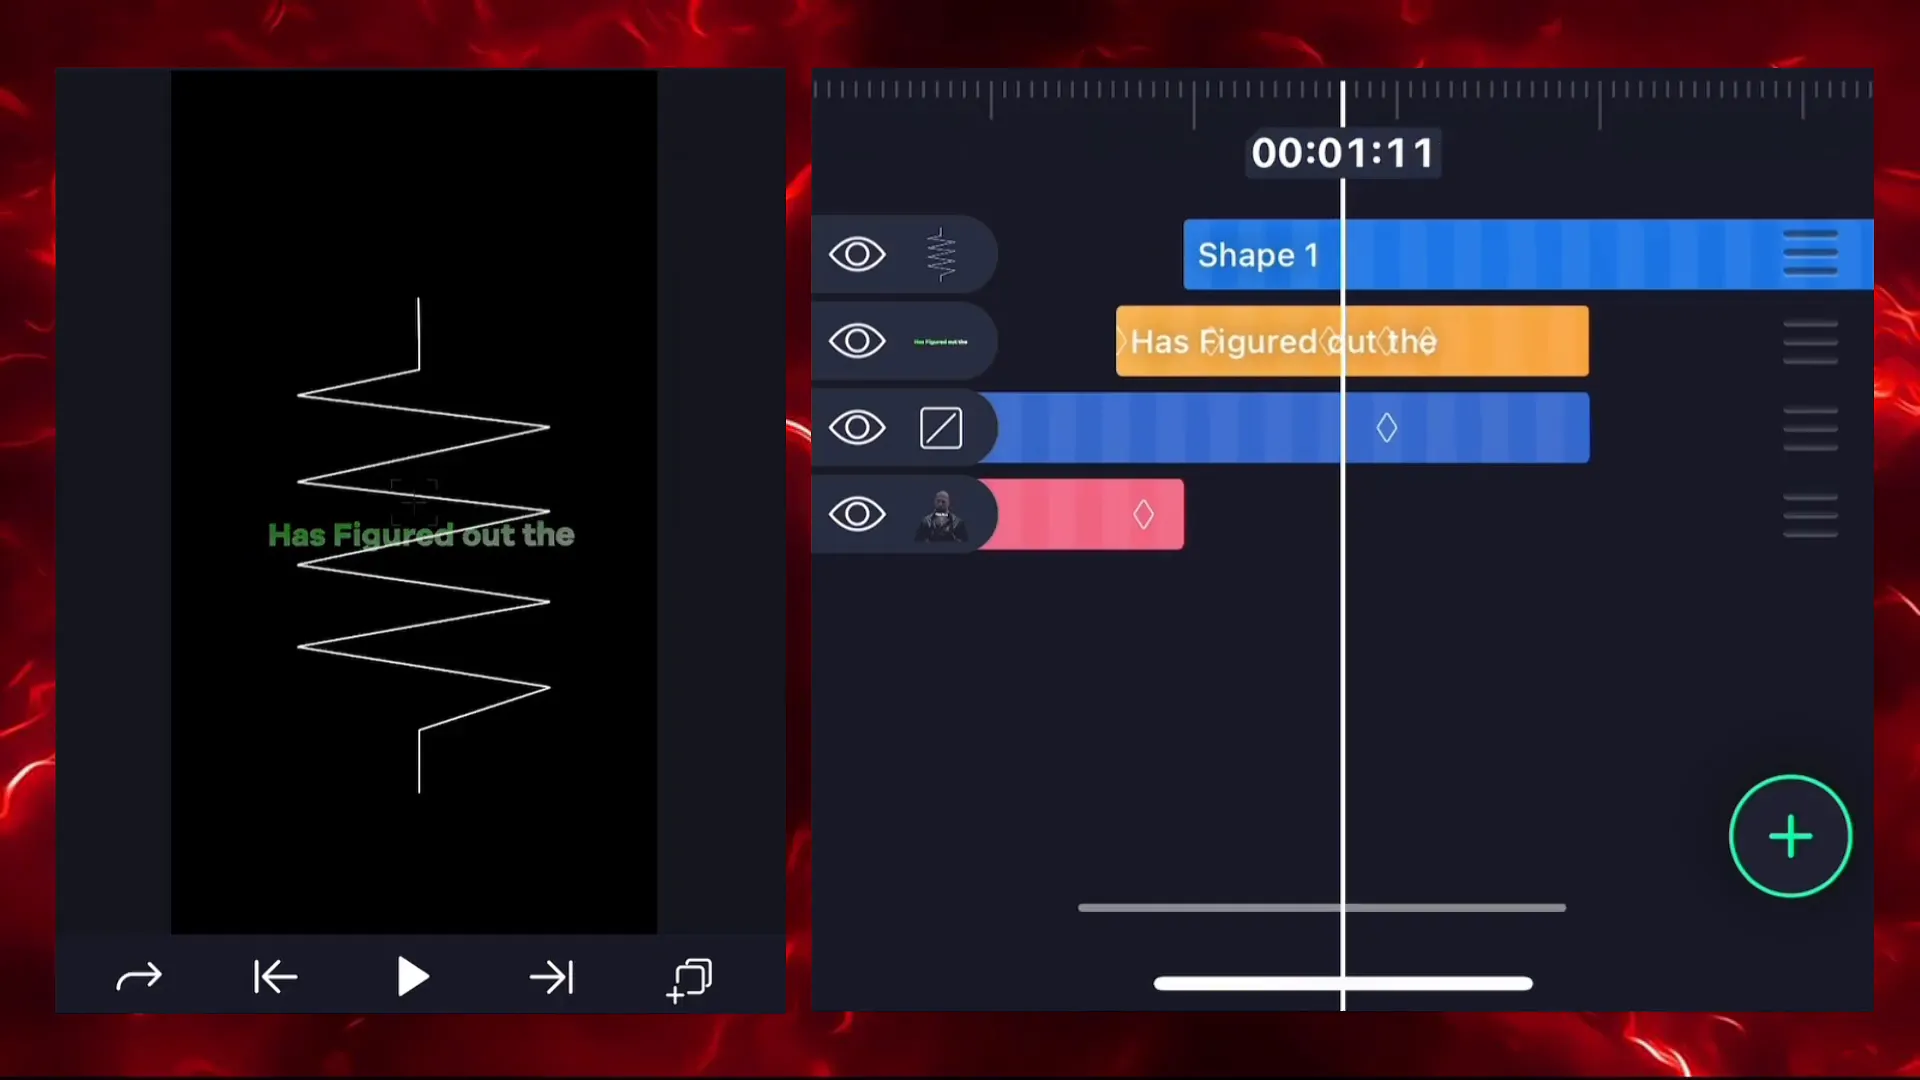
Step 7: Integrating Vector Drawings
Insert a vector shape and adjust its color and stroke settings. Place it beneath your text layer for a cohesive look. Add ‘Drawing Progress’ effect for a gradual reveal.
Step 8: Finalizing the Animation
Connect additional images and text layers to new null objects for more complex animations. Adjust key frames and graphs between them for a smooth transition.
Step 9: Adding Effects and Overlays
Apply the ‘Edge Glow’ effect for a vibrant text appearance. Add overlays like ‘Damage Film’ to give your video a professional touch.
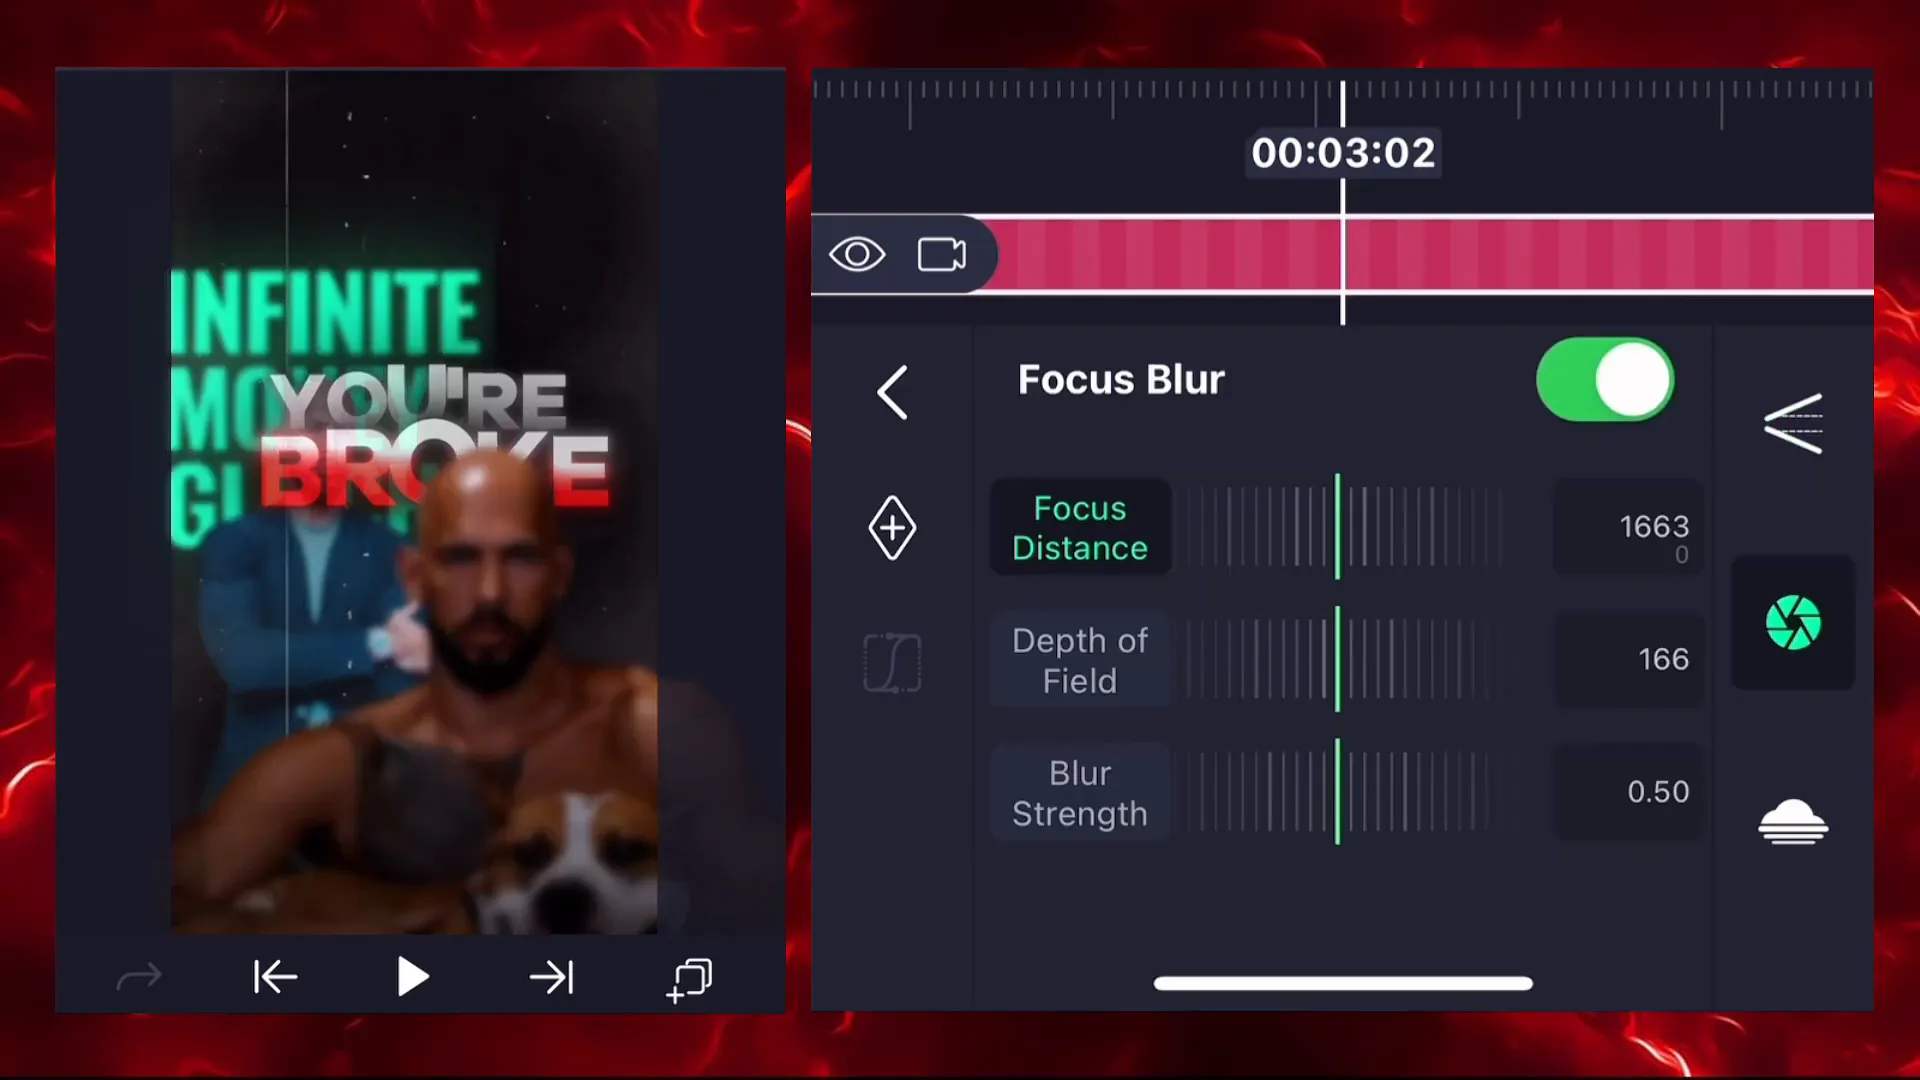
Step 10: Camera Movements and Focus
Enable the camera option to adjust focus blur and distance, ensuring your video has the desired depth and clarity.
Conclusion
And there you have it! With this Alight Motion 3D tutorial, you’re now equipped to create eye-catching 3D reels. Practice these steps, experiment with different effects, and watch your editing skills reach new heights.
For more video editing tutorials, explore our guides on blog Page Ranjan Editz:
- Advanced Techniques in Alight Motion
- Creative Transitions for Viral Reels