
Hello everyone! Are you ready to dive into the world of text animation? Today, I’m excited to guide you through creating smooth text animation using After Effects. Whether you’re a beginner or looking to refine your skills, this step-by-step After Effects tutorial is designed to help you create stunning text effects effortlessly.
Table of Contents
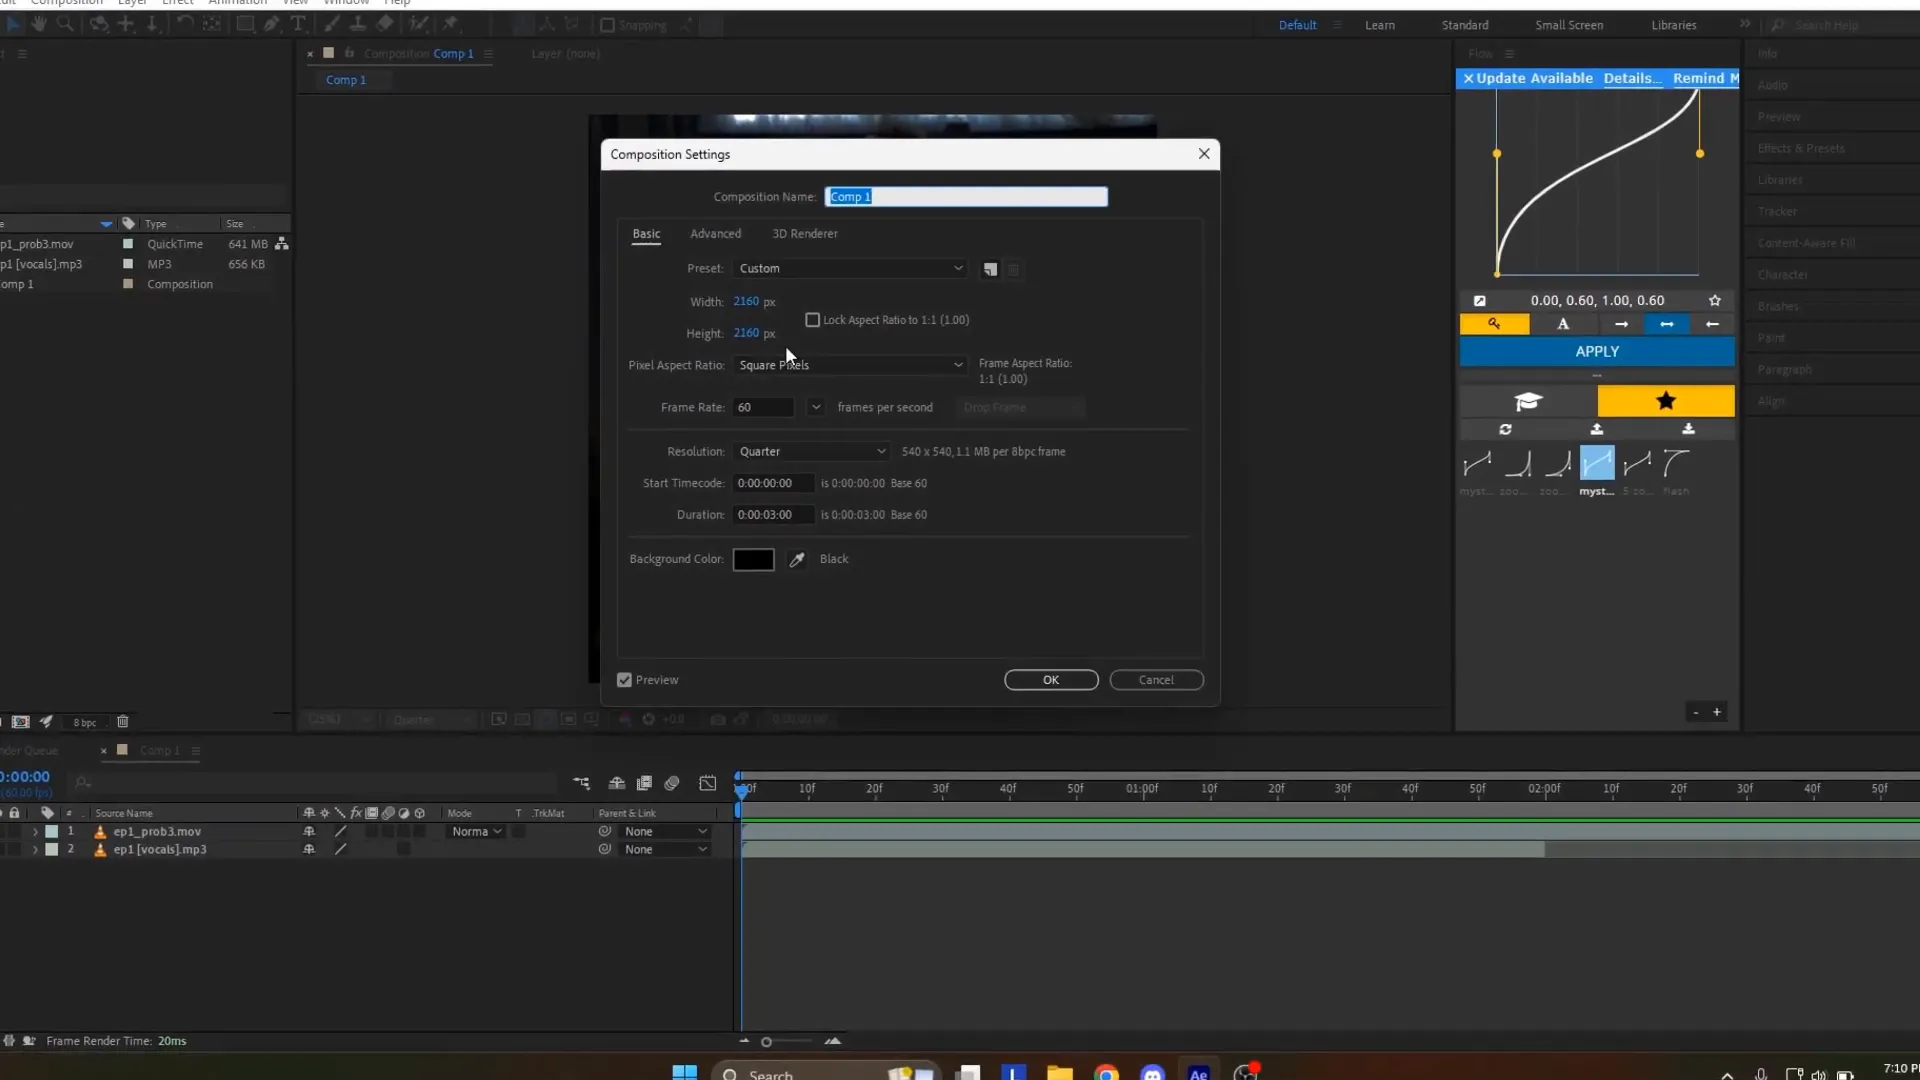
Step 1: Setting Up Your Composition
Let’s start with the basics. First, create a new composition. Here are the settings I recommend: a standard box size of 1080 x 1080. This size works well for most projects. Once your composition is set, open the Characters tab on the right side and adjust the settings to match mine. This will ensure consistency throughout the tutorial.
Step 2: Creating a Text Layer
Next, click on the ‘T’ icon in the top bar to create a text layer within your composition. Click on the preview area to start typing your text. This is where you can get creative with your message. After inputting your text, head over to the Effects tab.

Step 3: Adding Fade Effects
Now, let’s add some magic! Search for the ‘Fade’ effect in the Effects tab and drag ‘Fade Up Words’ onto your text layer. To see the keyframes, click on the text layer and press ‘U’ on your keyboard. Adjust the keyframes to align with the timing of your text appearing on screen. Start the first keyframe two or three frames before the text appears and end it five or six frames after.
Step 4: Smooth Fade Out
To create a seamless transition, apply the ‘Fade Out Slow’ effect to your text layer. This will help the text fade out smoothly. Position the first Fade Out keyframe ten frames before the last Fade Up keyframe and the last Fade Out keyframe one second after. Feel free to adjust these settings to match your style.

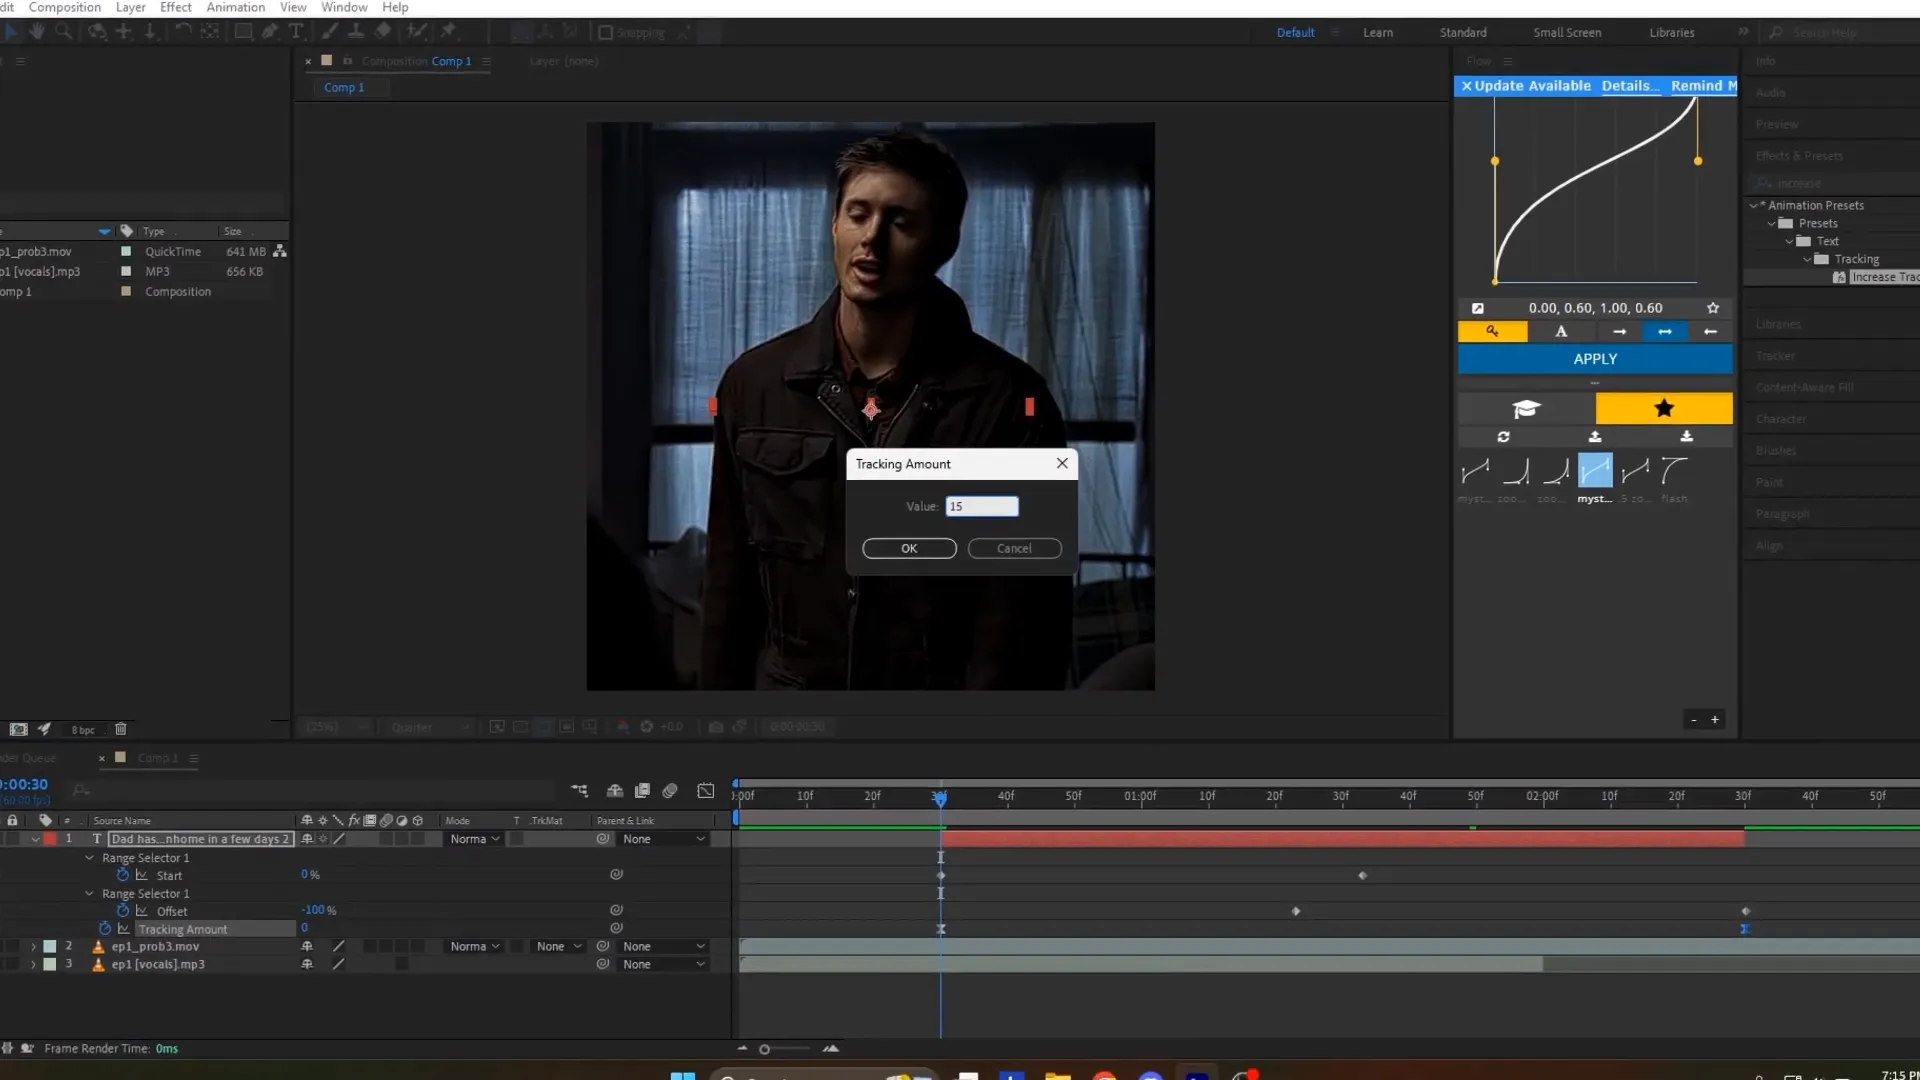
Step 5: Adding Movement with Increased Tracking
To bring your text to life, search for the ‘Increased Tracking’ effect in the Effects tab and drag it onto your text layer. Move the last keyframe to the end of the layer. Right-click on this keyframe, select ‘Edit Value’, and set it to 5 to 10 for 1080p or 10 to 20 for 4K. This will add a subtle yet effective movement to your text.
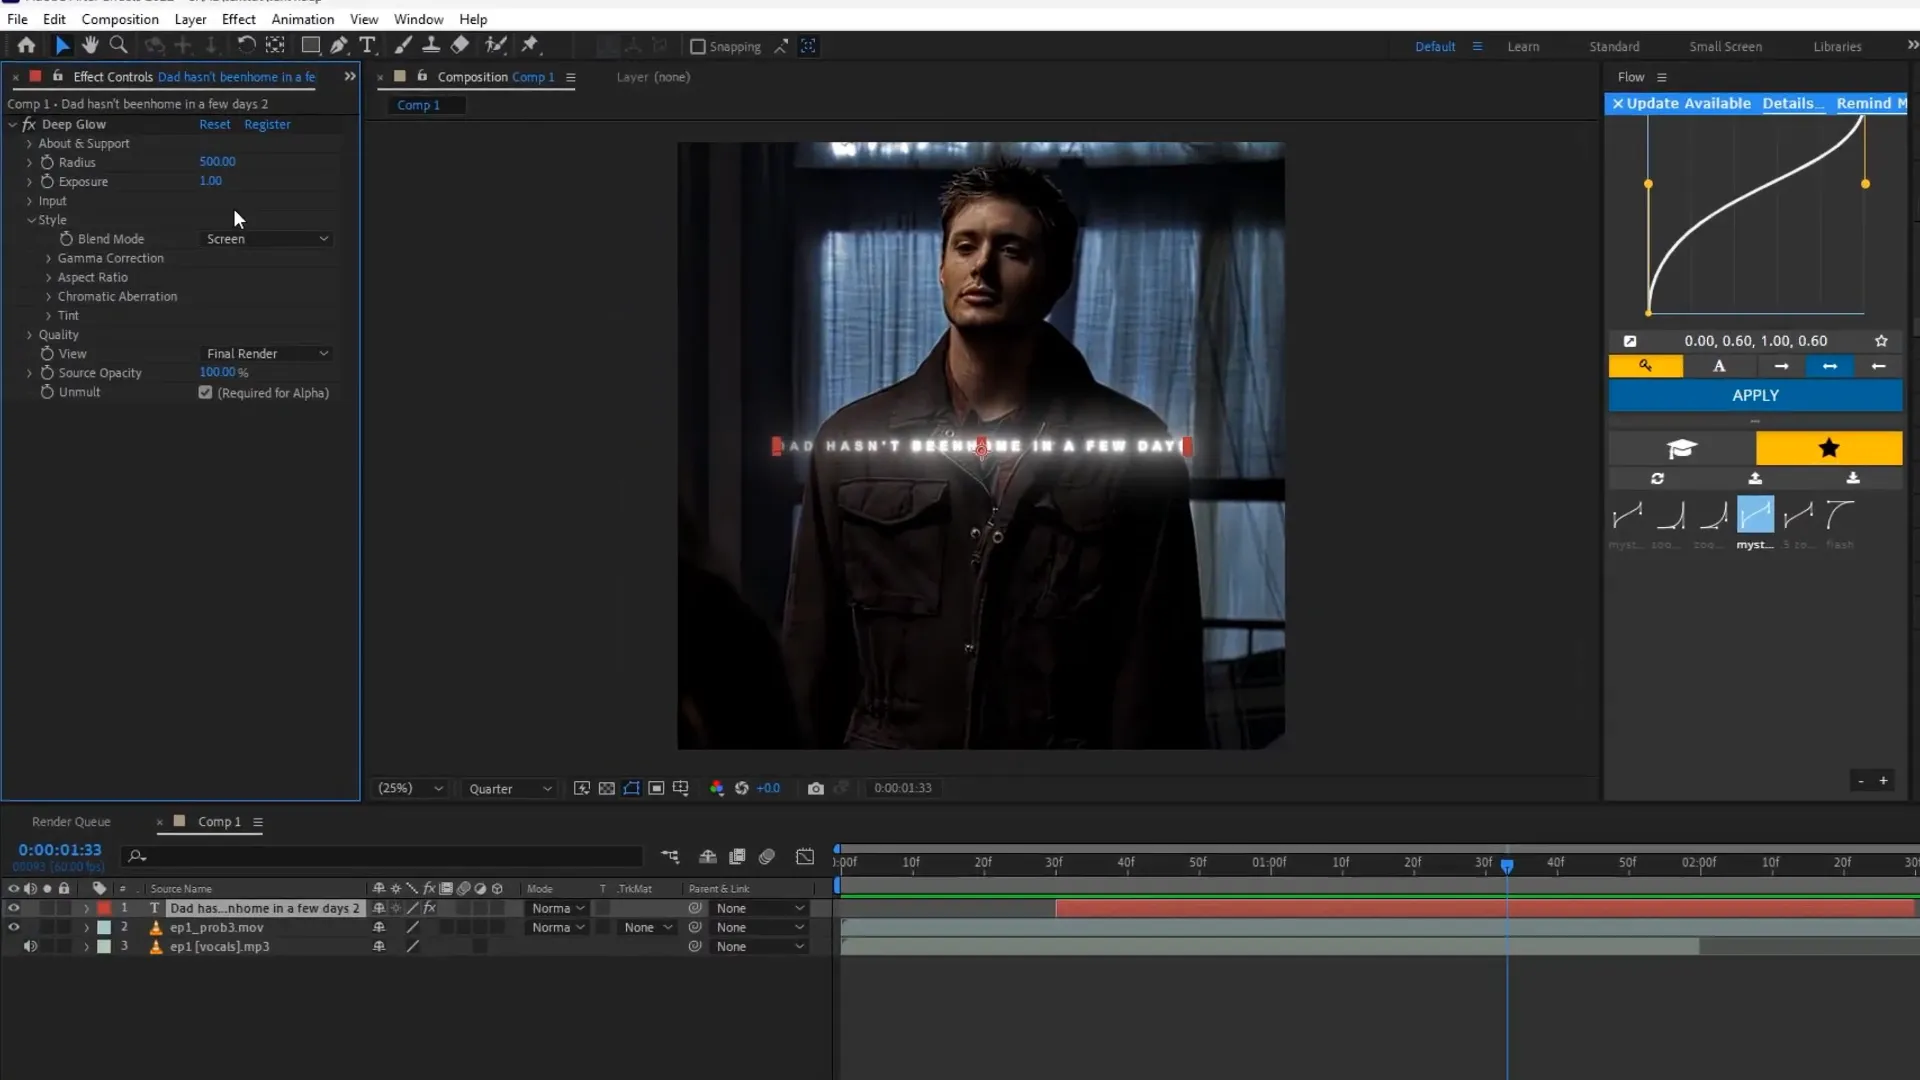
Step 6: Enhancing with Glow Effect
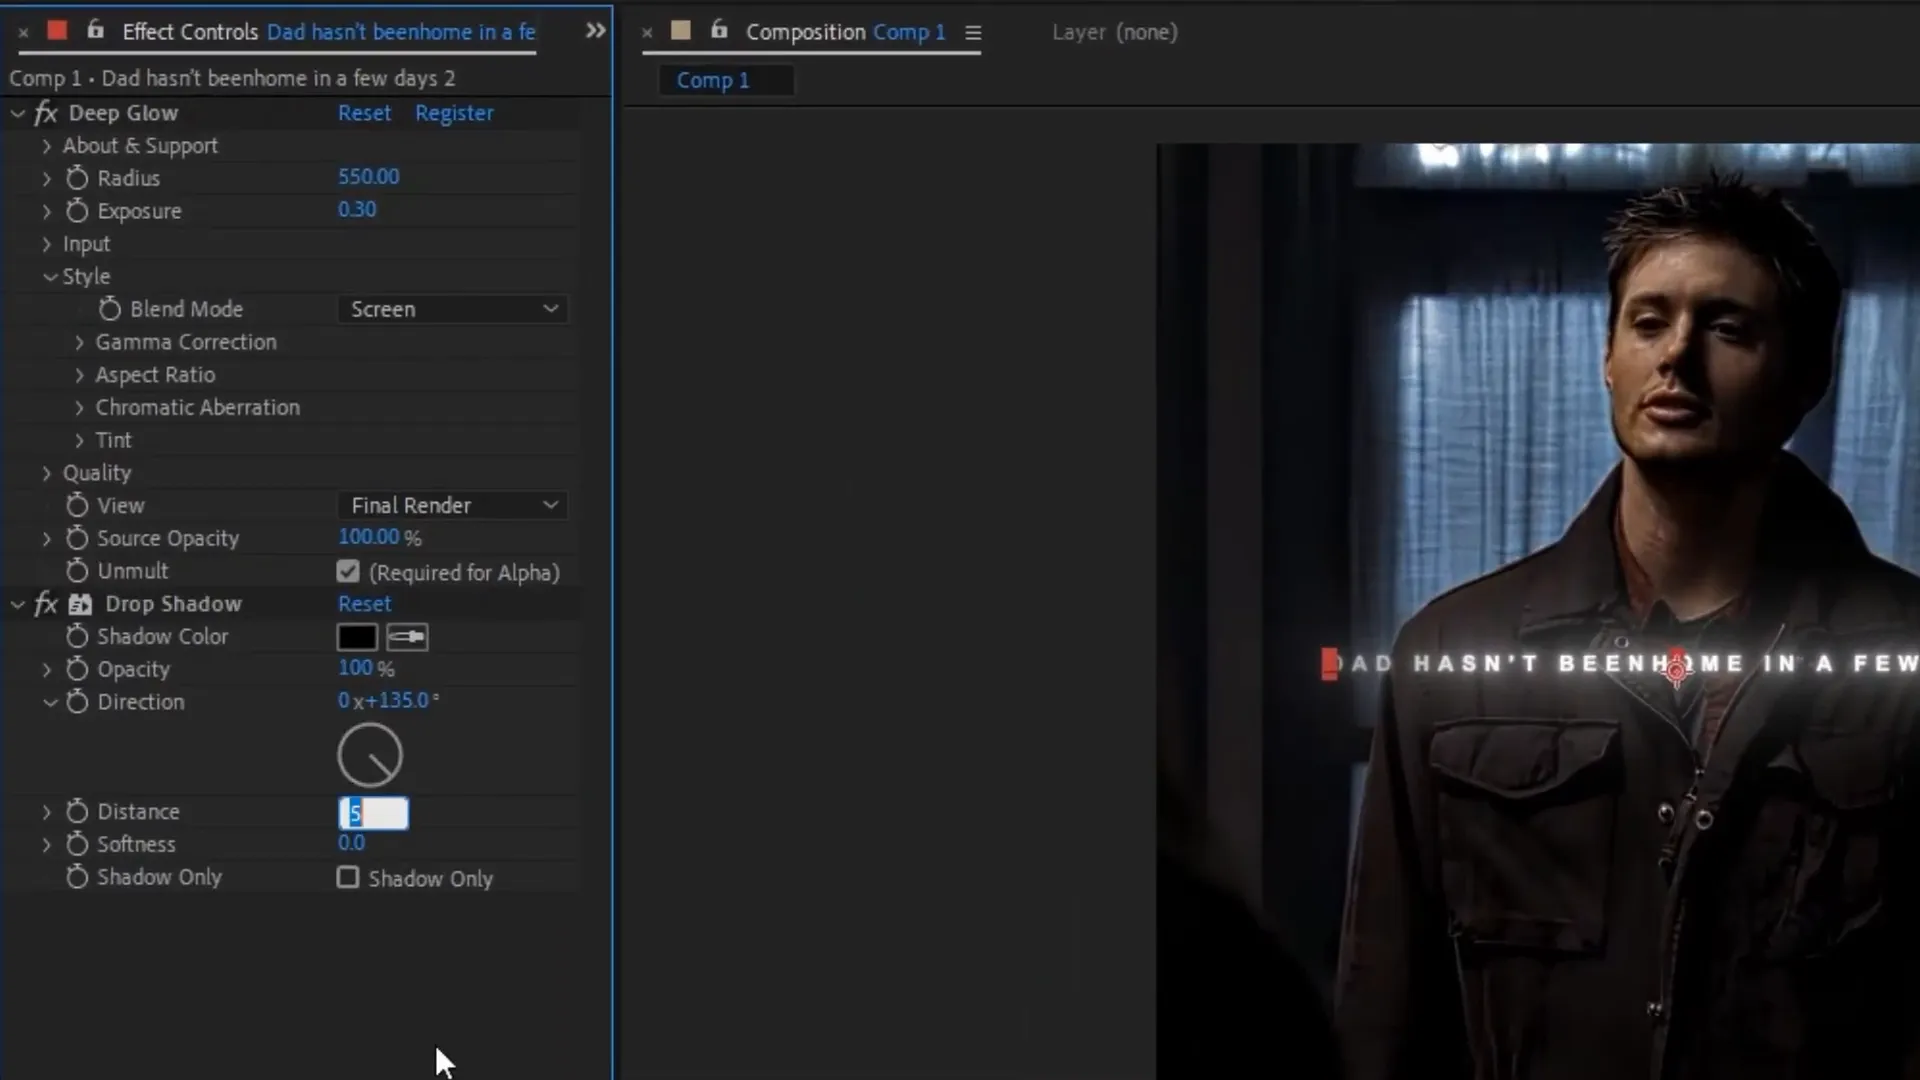
Let’s add a glow! Find ‘Deep Glow’ in the Effects tab and apply it to your text layer. Adjust the parameters as needed to achieve the desired glow intensity. This effect will make your text pop and add depth to your animation.
Step 7: Creating Depth with Drop Shadow
For added depth, search for ‘Drop Shadow’ in the Effects tab and apply it to your text layer. Adjust the parameters to your liking. If you want more depth, select ‘Drop Shadow’ in the Effects Control panel, press Control + D to duplicate it, and tweak the settings. Using two drop shadows can create a more pronounced effect.
Final Thoughts
And there you have it! A complete guide to creating smooth text animation in After Effects. By following these steps, you’ll have a dynamic and engaging text animation ready to impress. Don’t hesitate to experiment with different settings and effects to make it uniquely yours.
Thank you for following along with this After Effects tutorial. I hope you found it helpful and are excited to apply these techniques to your projects. Stay tuned for more tutorials, and keep creating amazing animations!
For More tips and tricks video editing, follow on Ranjan Editz