

Are you looking to enhance your video editing skills and create stunning effects? In this blog post, I will share my personal experience with the 5 Viral Transitions in After Effects. Each transition is designed to grab your audience’s attention and keep them engaged. Let’s dive right in!
Table of Contents
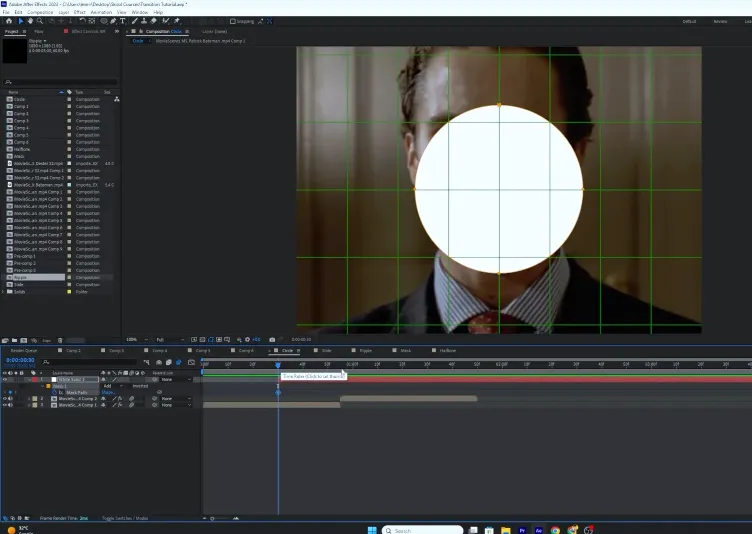
Step 1: Circle Transition
To start off, we will create a visually appealing circle transition. Follow these steps:
- Create a new solid layer by clicking on Layer > New > Solid. Choose a color for your circle (I recommend white).
- Cut the solid layer where you want the animation to start using Control + Shift + D.
- Select the solid layer and choose the Ellipse Tool to draw a circle in the center of the screen. Hold Shift while drawing to keep it perfectly round.
- With the layer selected, press M to bring up the mask path and set a keyframe at the beginning. Move to the end of the transition and set a second keyframe by expanding the mask to cover the entire composition.
- To create a popping animation, adjust the size of the circle and use the Proportional Grid to center it.
- Duplicate the layer and change the color of the top layer to red using the Fill Effect.
- Adjust the keyframes to create a smooth animation using Easy Ease and the Graph Editor.
Step 2: SL Transition
The SL transition is popular for its simplicity and effectiveness. Here’s how to create it:
- Overlap two clips in your timeline.
- Add a camera by clicking on Layer > New > Camera.
- Create a Null Object and connect it to your camera using the Pick Whip Tool.
- Move the top clip to the right side of the screen.
- Set keyframes for the X position of the null object to create the sliding effect.
- Use the Graph Editor to adjust the keyframes for a smoother animation.
Step 3: Ripple Effect Transition
This transition adds a unique ripple effect to your clips. Here’s how to achieve it:
- Create a new Adjustment Layer and cut it to fit your transition duration.
- Apply the BCC Ripple Dissolve effect to the adjustment layer and adjust the settings for height and ease.
- Make a red solid layer, and create a circular mask that is larger than your composition.
- Set keyframes for the mask path and opacity to create the ripple effect.
- Enable motion blur for a smoother finish.
Step 4: Masking Background Transition
This transition uses masking to create a seamless background switch:
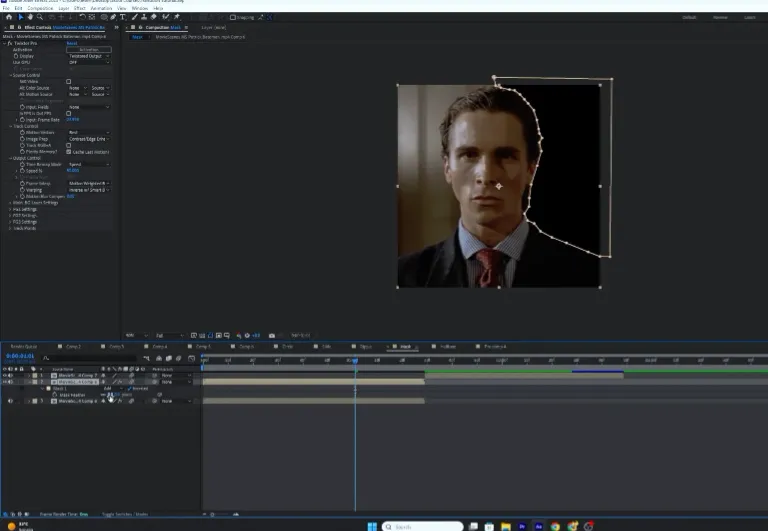
- Duplicate your clip and use the Pen Tool to create a mask around the character.
- Enable the Inverted Mask option to reveal the background clip beneath.
- Set keyframes for the opacity to fade the background in and out.
- Utilize a camera and null object to zoom in on the character during the transition.
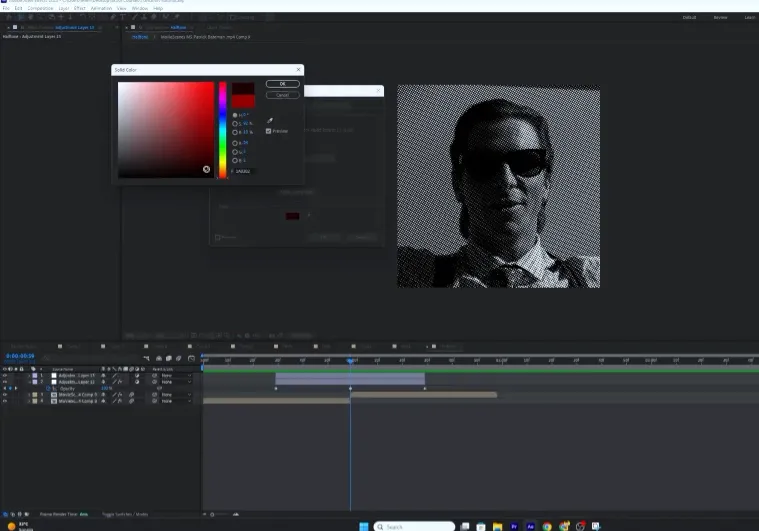
Step 5: Half Tone Black Bar Transition
Finally, let’s create a stylish half tone black bar transition:
- Create a new adjustment layer and cut it to 30 frames before and after your transition.
- Apply the BBC Half Tone effect to the duplicated adjustment layer.
- Create a black solid layer and apply the CC Jaws effect to create the black bar effect.
- Set up amplitude keyframes for the shake effect on the adjustment layer.
- Adjust the keyframes in the Graph Editor for a smooth finish.
Conclusion
These 5 Viral Transitions in After Effects are sure to enhance your video projects and engage your audience. Remember to experiment with different effects and settings to find what works best for your style. If you want more tips and tricks on video editing, follow Ranjan Editz(www.ranjaneditz.com) for additional resources and inspiration!