

In the world of video editing, one of the most sought-after skills is the ability to remove object from video. Whether you’re looking to eliminate distractions or enhance your storytelling, mastering this technique can significantly improve the quality of your videos. In this guide, I’ll walk you through the process based on my own experience using the latest version of Final Cut Pro.
Table of Contents
Step 1: Select Your Video Clip
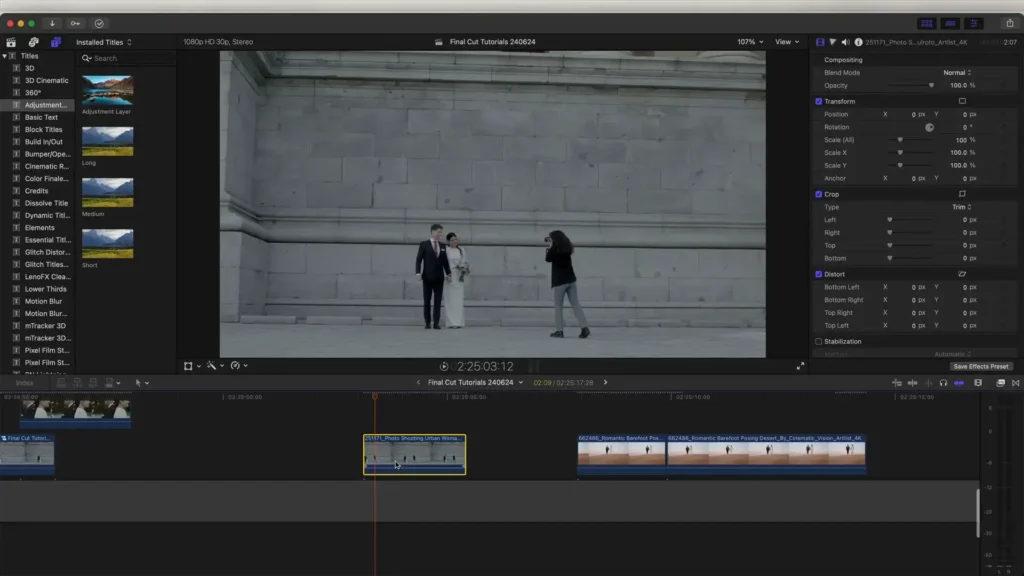
First things first, open your project in Final Cut Pro and select the video clip that contains the object you want to remove. In our example, we will be removing a photographer from the frame. Make sure you’re using the latest version of Final Cut Pro (version 11 or above) to access the necessary features.
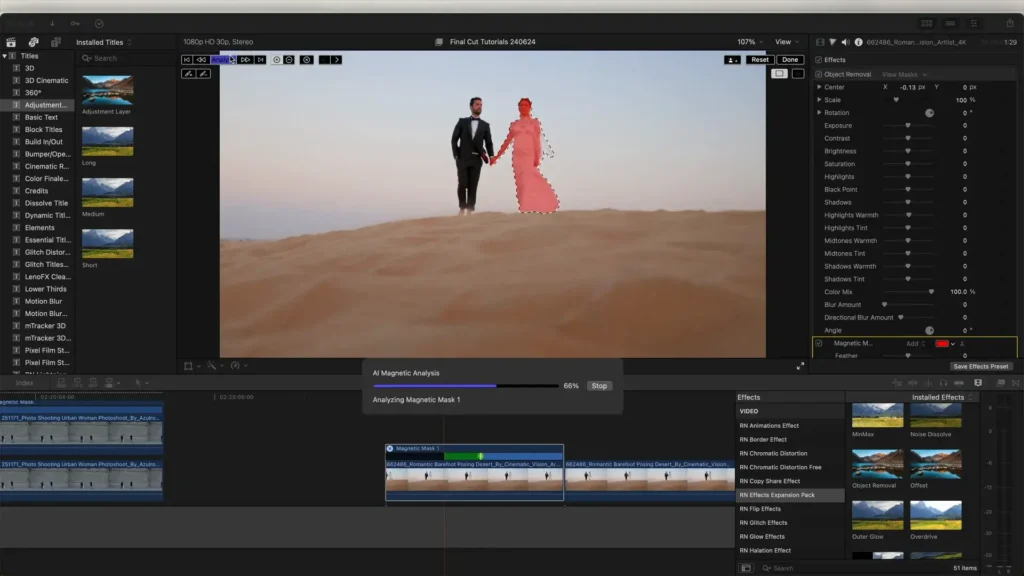
Step 2: Add a Magnetic Mask
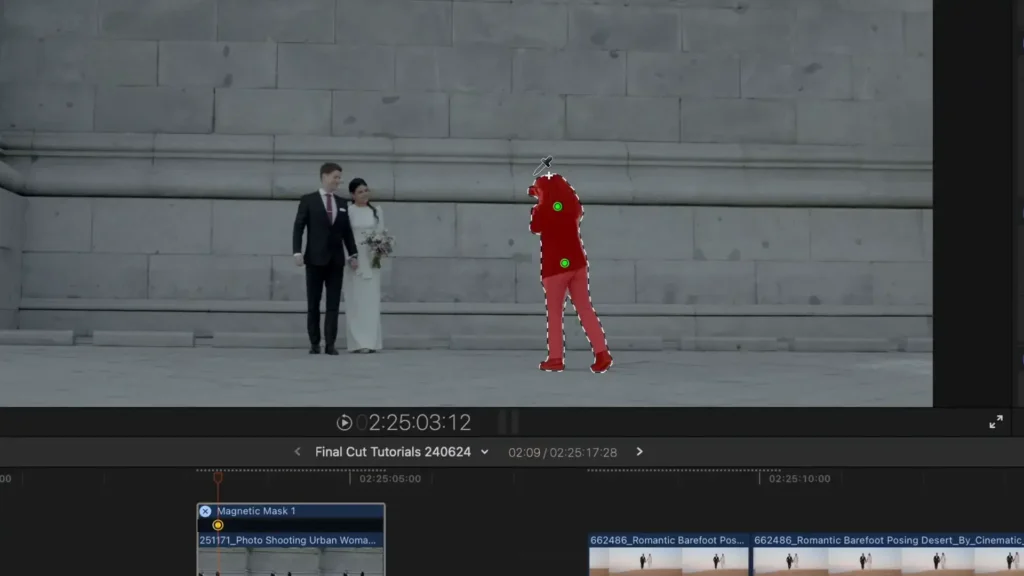
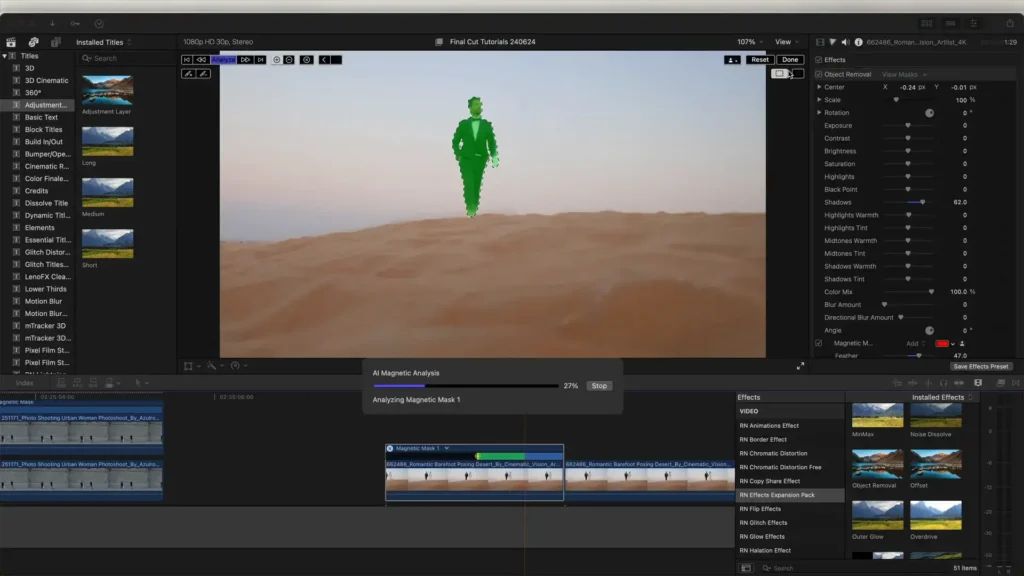
Next, go to the tools panel and select the Magnetic Mask tool. This feature is essential for tracking the subject you want to remove. Click on the subject (the photographer in our case) and then click on the Analyze button. This action will create a mask around the subject.
Step 3: Invert the Mask
Once the mask is created, you’ll want to remove the background. To do this, go to the mask settings and click on Invert Mask. This will eliminate the subject from the frame, leaving you with the rest of the video intact.
Step 4: Duplicate Your Video Clip
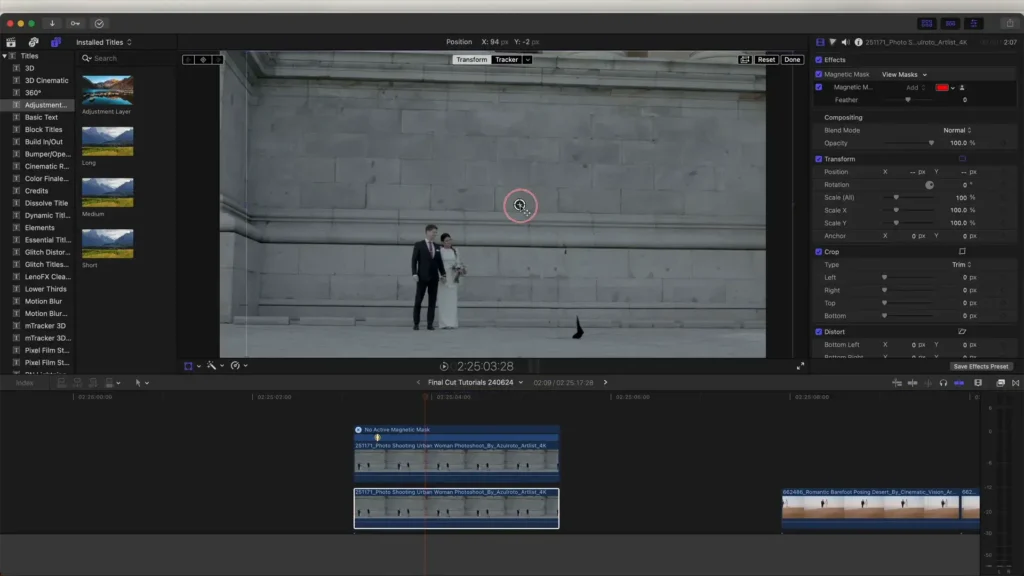
To fill the void left by the removed subject, copy and paste your original video clip onto a new layer below the masked clip. This will allow you to replace the area where the subject was with the surrounding video content.
Step 5: Adjust the Position
With your new layer in place, select the Transform tool. Move the video clip across the screen to perfectly align it with the area where the subject was. This technique works well for quick shots but may not be effective for every clip. Experiment to see what works best for your footage.
Step 6: Refine the Mask
After positioning, you might notice an outline around the area where the subject was. To improve the blend, select the top video clip again, and adjust the feathering of the mask. Increasing the feather will help eliminate any hard edges, making the edit less noticeable.
Step 7: Use the Object Removal Plugin
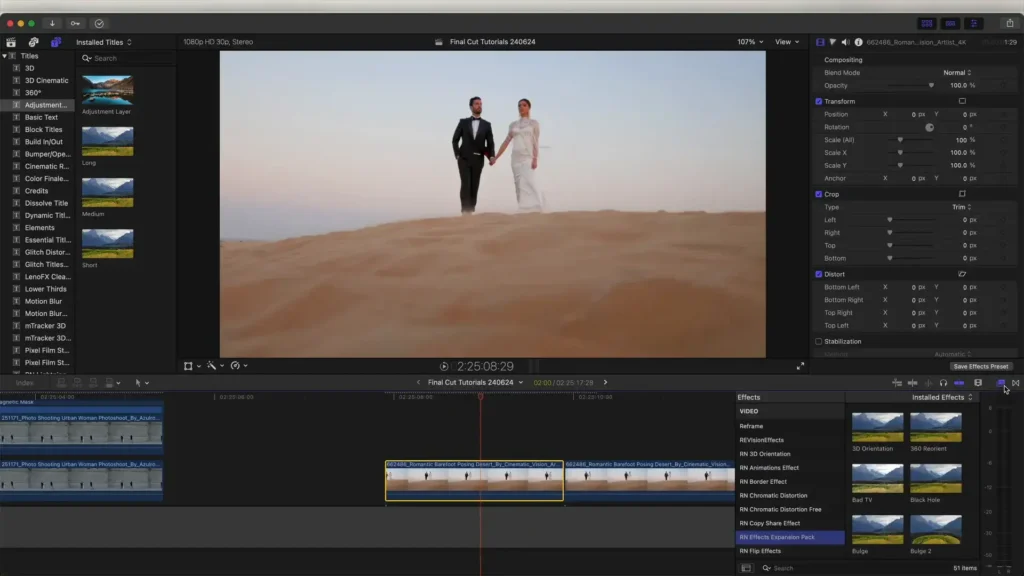
If you want to speed up the process, consider using an object removal plugin. If you already have the Effects Expansion Pack, this plugin will be included. Simply drag the plugin onto your video clip and select the part of the video you want to remove. Click Analyze, and it will automatically track and remove the subject.
Step 8: Adjust Exposure and Blend
Once the subject is removed, you can further refine the appearance by adjusting the exposure settings. This will help blend the mask into the background better, ensuring a seamless look.
Step 9: Create Reveal Effects
For creative edits, you can also use the magnetic mask to create reveal effects. Add a transition or effect to reveal other characters in the scene. In our case, we used a pixel scan effect for a stunning reveal.
Final Thoughts
Mastering how to remove object from video can elevate your editing skills and enhance your projects. With practice, tools like Final Cut Pro make this process efficient and effective. If you’re looking to improve your video editing further, consider following Ranjan Editz for more tips and tricks!
For those interested in additional resources, check out the Object Removal Plugin that can simplify your editing process even more.