Welcome to your ultimate guide on creating stunning video edits with Filmora 12! In this post, we’ll dive deep into the process of crafting an aggressive shake video edit. This tutorial is straightforward and packed with tips to enhance your editing skills. Let’s get started!
Table of Contents
Setting Up Your Timeline
Begin by importing your clips and audio into the timeline. Once you have everything in place, add markers on the beats of the audio layer to synchronize your clips effectively.
Creating Zoom Movements
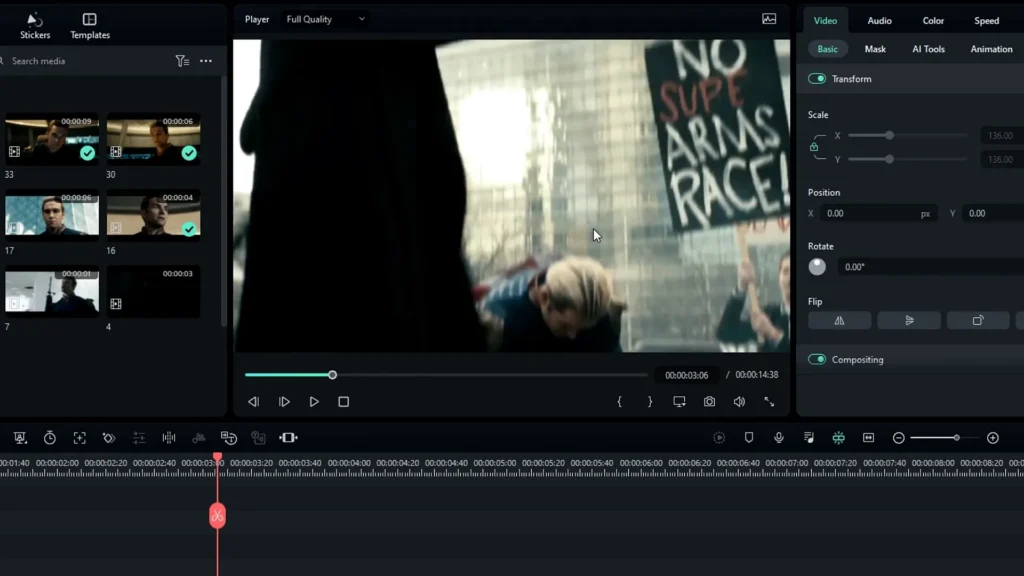
The first effect we want to create is a zoom movement. Start by going to the beginning of your clip and create a keyframe on the scale. Then, navigate to the end of the clip and increase the scale to your liking. Repeat this process for all other video clips.
Adding Fade-Out Effects
Next, let’s create a fade-out effect. Select the clip on the timeline, go to the opacity settings, and create a keyframe. Move to the end of the clip and change the opacity to zero. Apply this fade-out to the other clips as well.
Incorporating Shake Effects
Now, it’s time to add a shake effect. First, we’ll add a motion blur. Navigate to the New Blue FX, select Stylize, then choose Motion Blur and add it to the beginning of your clip. Move three frames forward and split the layer. Adjust the blur settings to 15, the angle to 30, and increase the blending.
Next, create multiple copies of this effect, adjusting the blur amounts to 10 and 5 for each subsequent copy. This layering will enhance the motion blur effect significantly.
Adding the Shake Effect
For the shake effect, go to the video effects, select the extreme effect, and add it to your timeline. Change the frequency to 50. To increase the aggressiveness, add another extreme effect, split the layer, and set the frequency to 400.
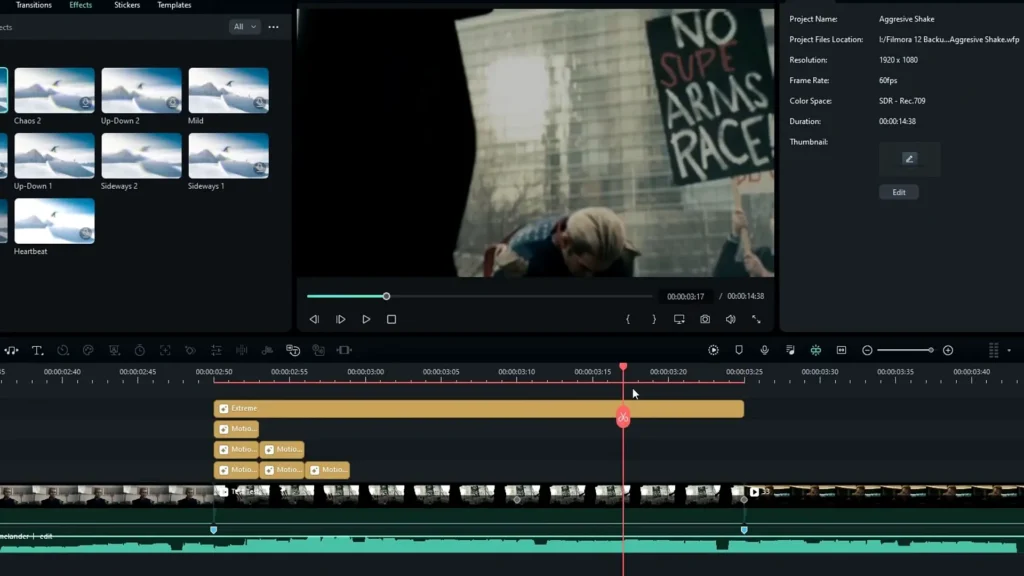
Now apply these effects to other video clips in your timeline to maintain consistency throughout your edit.
Creating Flashing Effects
To add a flashing effect, go to stock media, select a white solid, and add it to your timeline. Change the blend mode to Overlay and adjust the opacity to around 30. Create a keyframe on opacity, then set it to zero at the end of the clip. Don’t forget to add this overlay to your other clips as well.
Sharpening Your Edit
To enhance the sharpness of your video, add an adjustment layer and navigate to the color tab. Select Sharpen and set the value to 10. Adjust the vignette settings to your preference. Then, add a detail enhancer from the New Blue FX Essentials to boost the definition and strength.
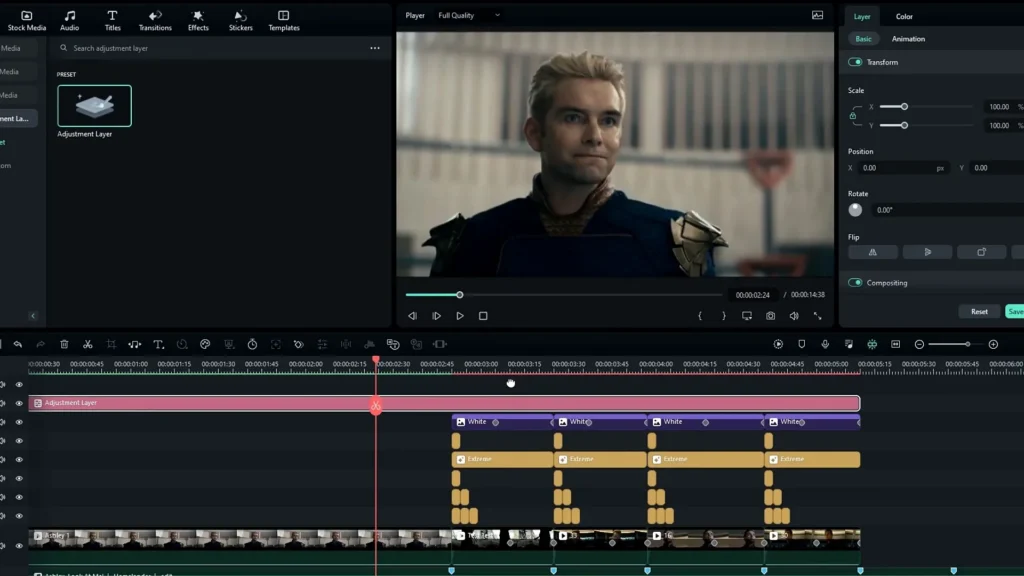
For a glowing effect, select the Boris FX Plus Lights and apply the glow edges effect to the adjustment layer. Tweak the glow settings until you achieve the desired look.
Final Touches: Flicker Effect
Finally, we can add a flicker effect. Go to the audio effects, select the flicker effect, and adjust the opacity value to around 0.95. This will give your video a polished, dynamic feel.
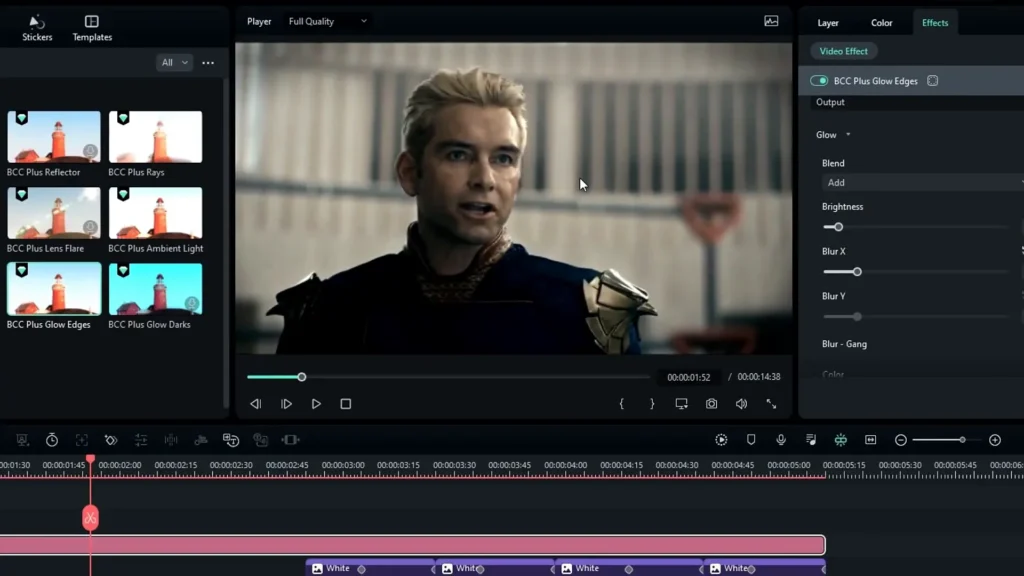
Smoothing the Final Edit
Your aggressive shake video edit is nearly complete! For those with access to the RSMB effect in After Effects, apply it for a smoother look. If you don’t have RSMB, you can use the fast lens blur effect in Filmora as a substitute. Export your completed video, then add it back to the timeline. Select the Boris FX blur effect and adjust the scale and iris settings for a smooth finish.
Learn more Editing tutorial & tips visitRanjan Editz
Conclusion
And there you have it! Your aggressive shake video edit is done. Remember, practice makes perfect, so keep experimenting with different effects and transitions in Filmora. If you want to explore more features, check out the [Official Wondershare Filmora – AI Video Editing Software](https://filmora.wondershare.com) for an extensive toolkit that makes video creation a breeze.

1 thought on “Mastering Filmora Smooth Transitions for Video Editing”